Table of Contents
Start/Stop Setup
Additional information on Program Stop and the associated PLC procedures is available here: Stop/End program button commands.
This article is designed to introduce the reader to the basic setup process of the Start/Stop procedure in myCNC settings.
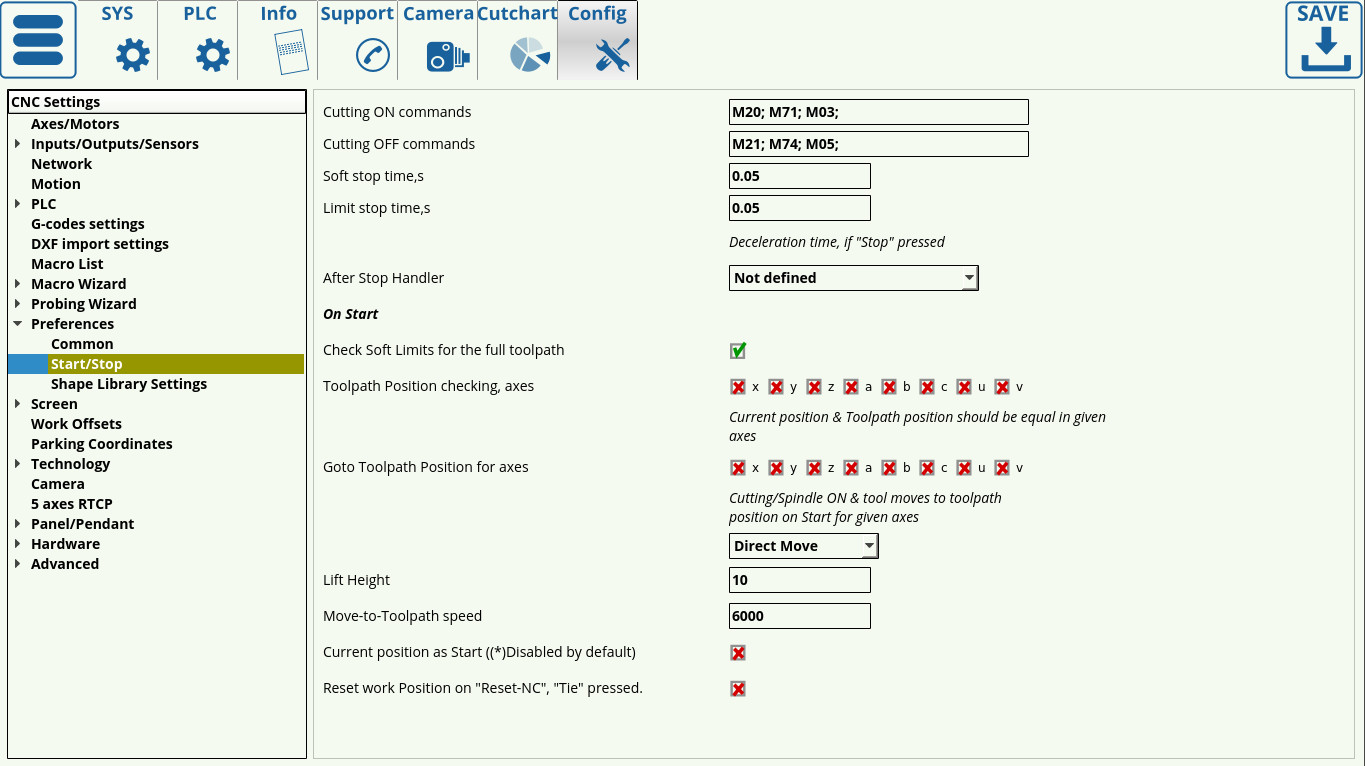
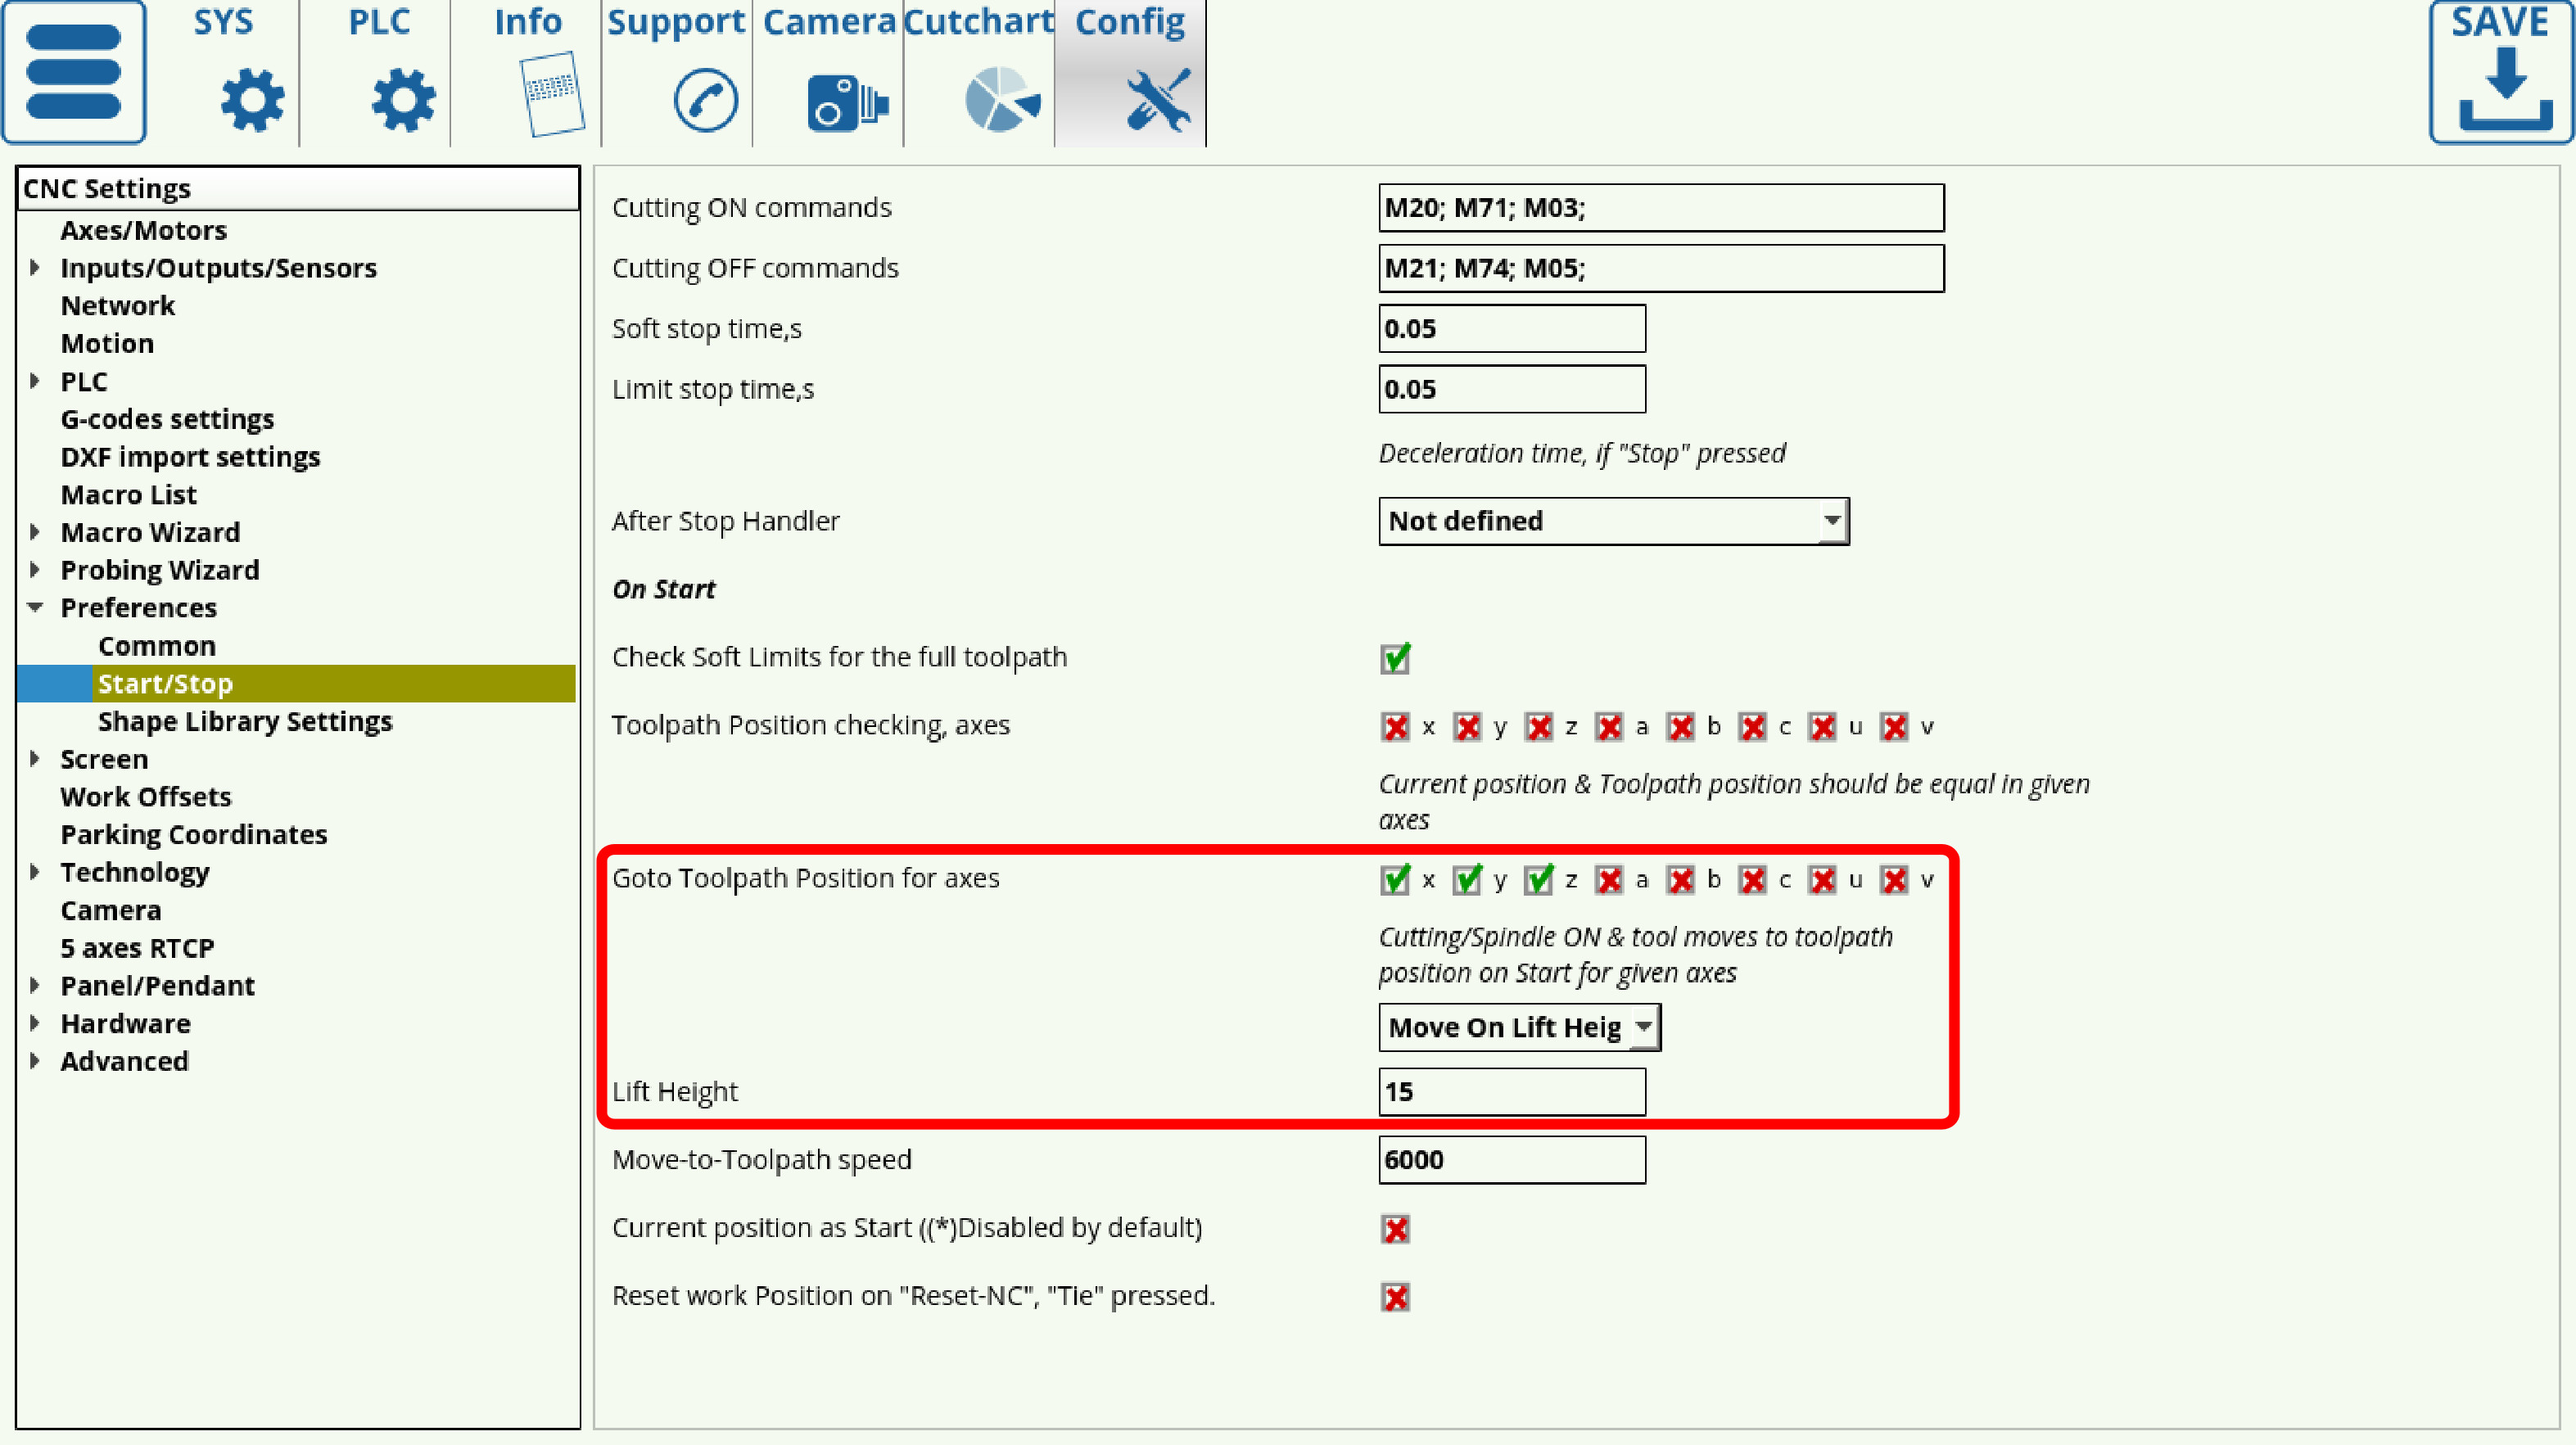
Upon opening CNC Settings > Preferences > Start/Stop, the following screen is presented to the user:
On Start behaviour
A common scenario with mill and plasma machines is having to move the plasma torch or any other working tool away from the cutting point in the middle of running a program, for cleaning/inspection/etc. In order to continue the cutting process smoothly after having stopped the machine and moved the working tool, the On Start section of the Start/Stop menu can be used to properly describe the behaviour of the machine when it is started again from the middle of the program.
The Check Soft Limits for the full toolpath toggle specifies whether the user wants to check the entire program for issues with soft limits (program work position going outside of soft limits) before starting the program. If the toggle is set to ON, and there are issues with the soft limits present, the program will not start. This setting is not recommended for extremely large programs, as it takes a lot of time to run the check. Programs under 10 000 lines of code are best suited for this process.
The behaviour of the machine with all the flags turned OFF is to simply continue cutting straight from the the point to which the working tool has been moved, as if it was still at its original position. This can lead to issues with cutting, since this effectively fails to cut the particular part at which the machine has been stopped. In order to correct this, two options are present.
- OPTION 1: Block the machine from starting up again if the new start point for the cut is not the same as the stop point.
- OPTION 2: After the machine has been stopped and move, automatically move it back to the original stop position before attempting to cut again.
NOTE: Only one option can be chosen for each given axis
Option 1: Block the machine from running
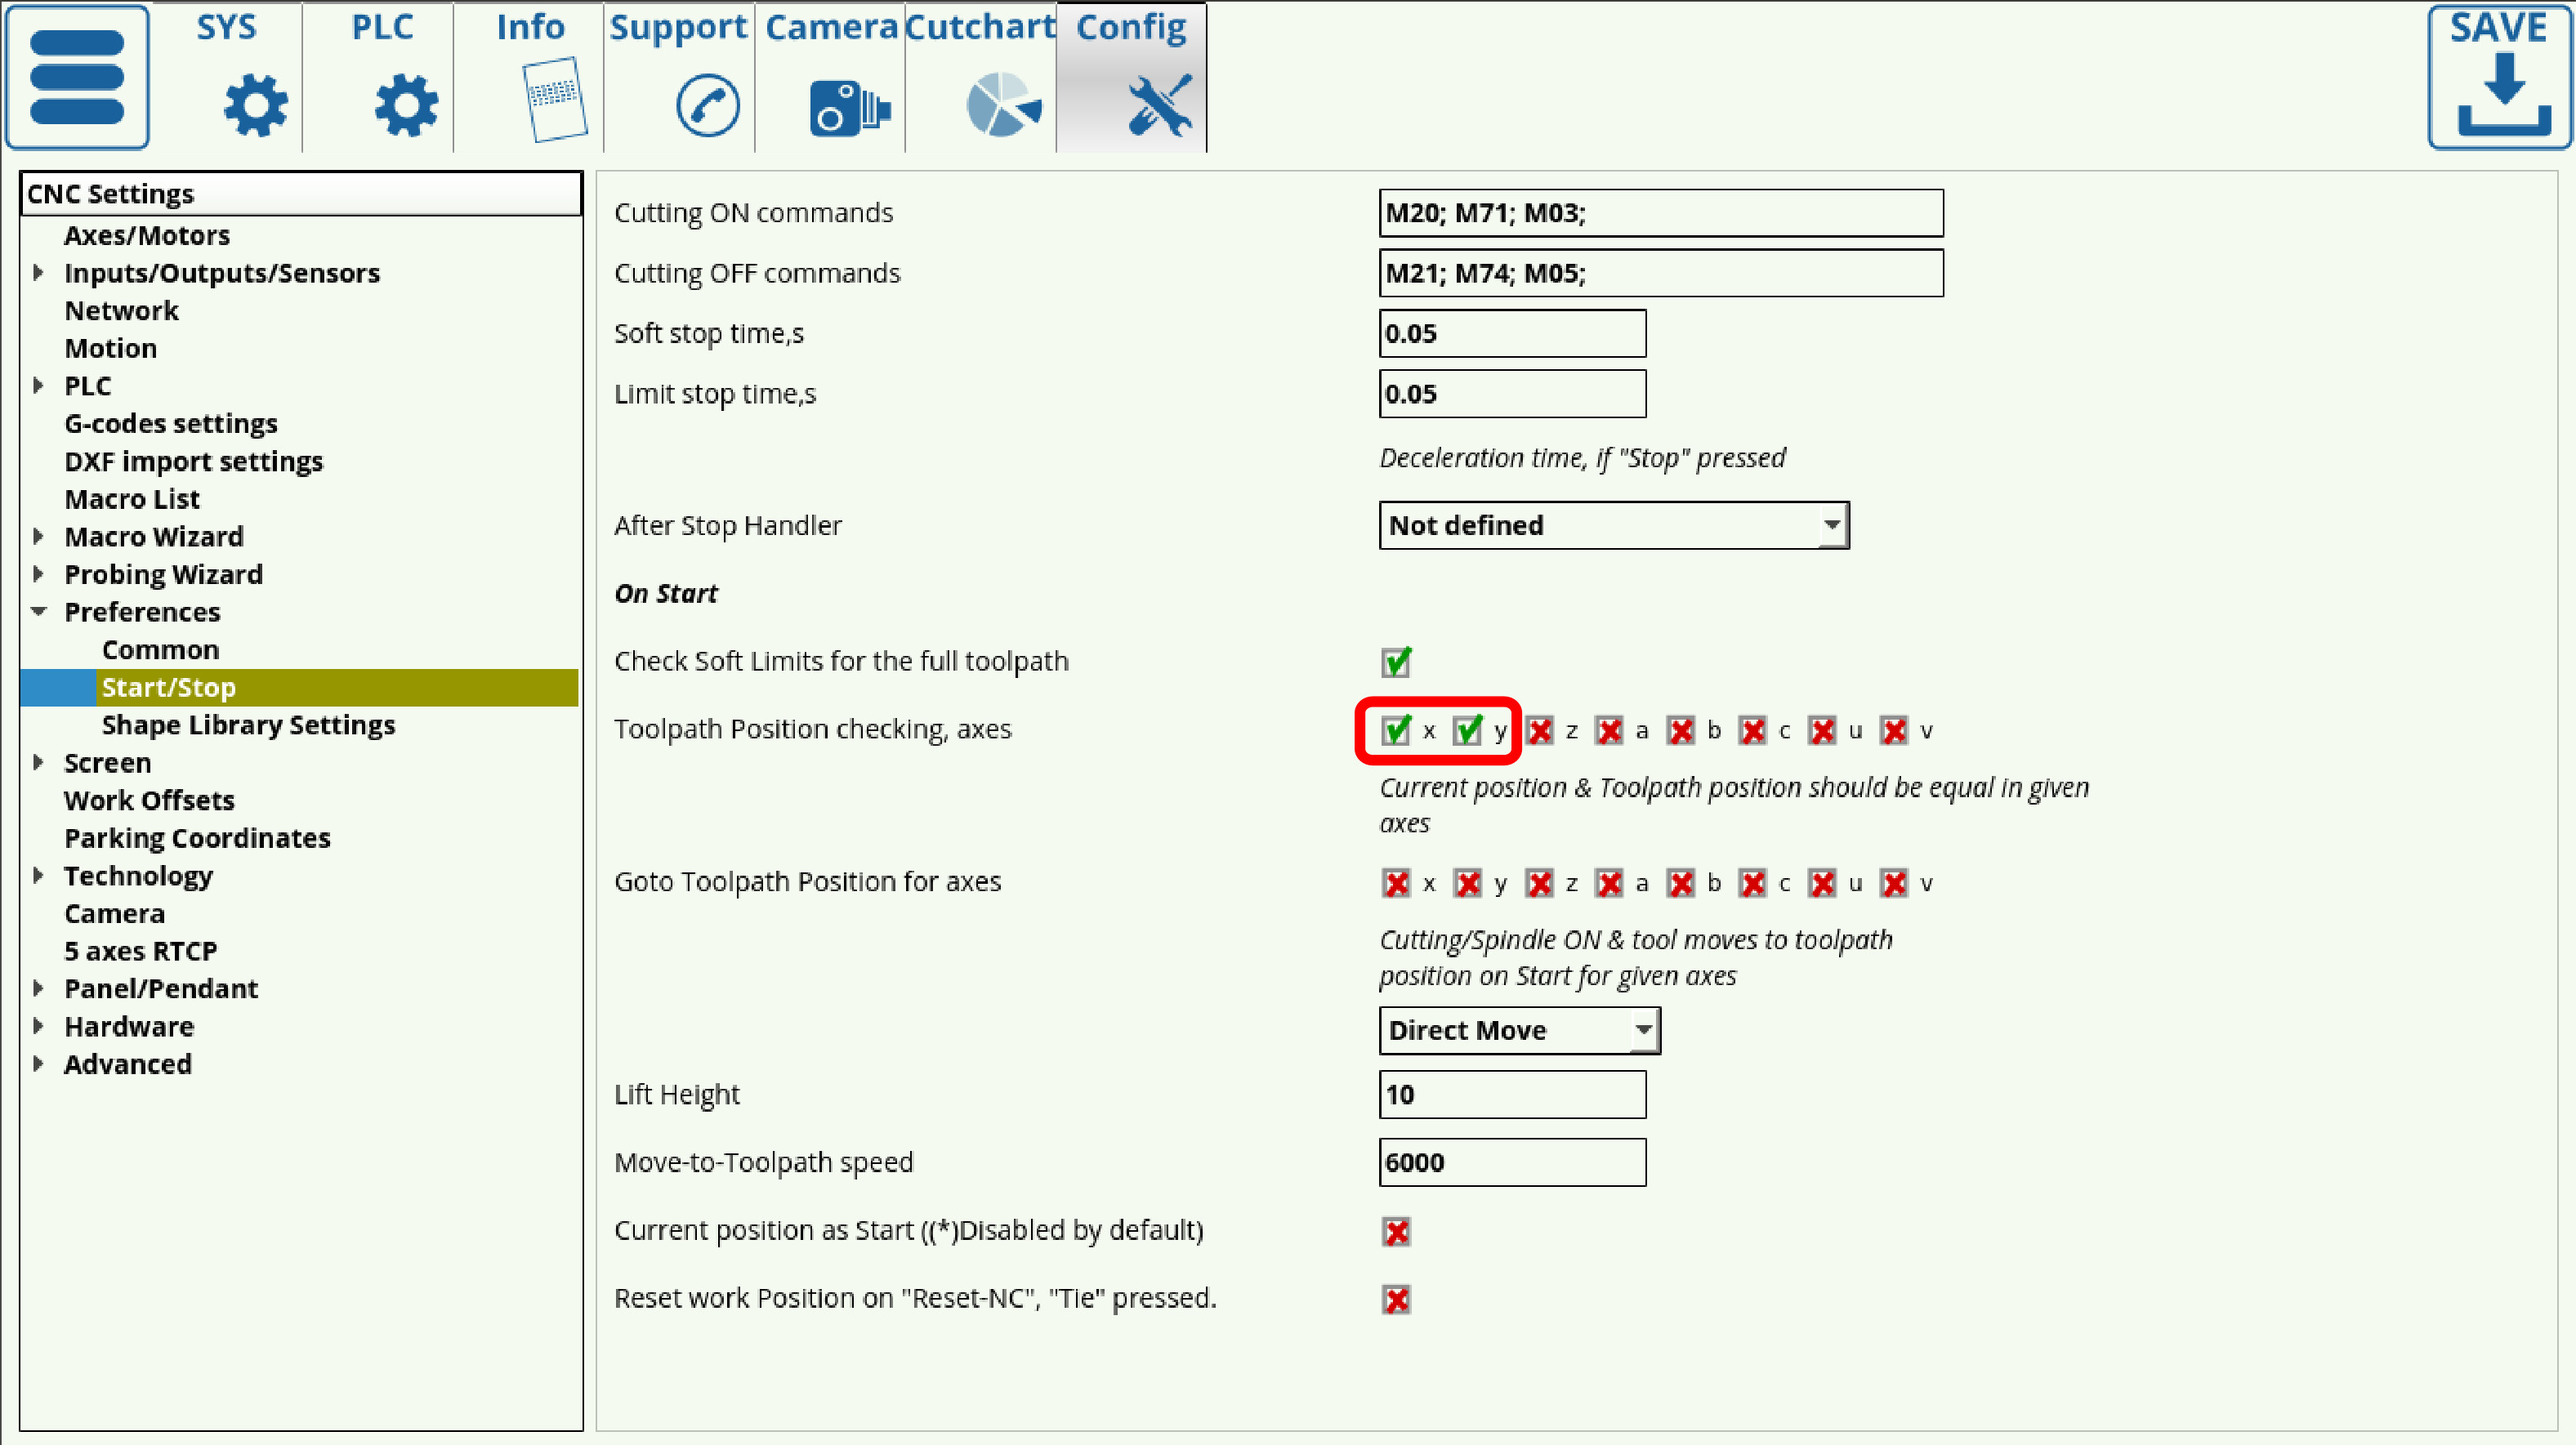
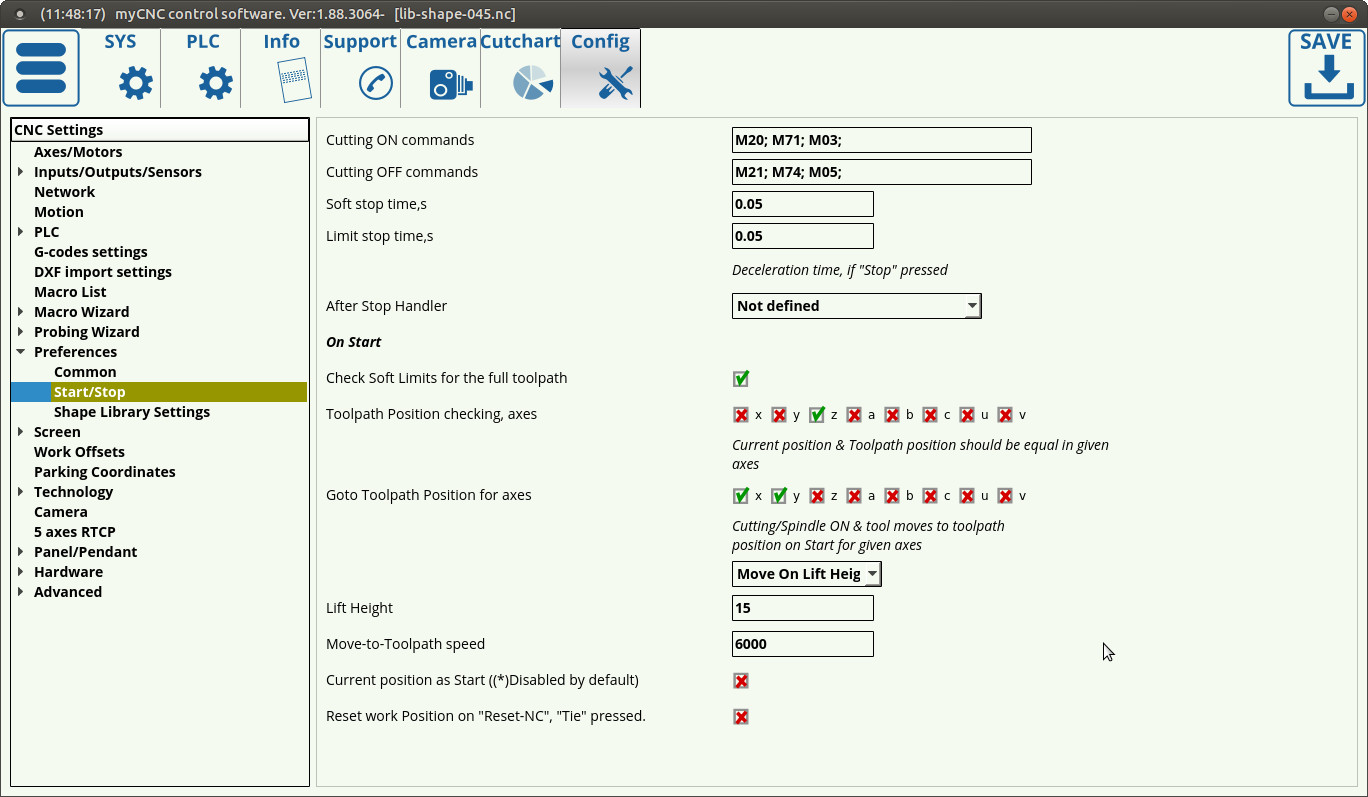
In order to block the machine from running if its new start position is different from its stop position, the user can select the particular axes for the machine to check before running. In the example below, the x- and y-axes have been selected to check their position before attempting to move again.
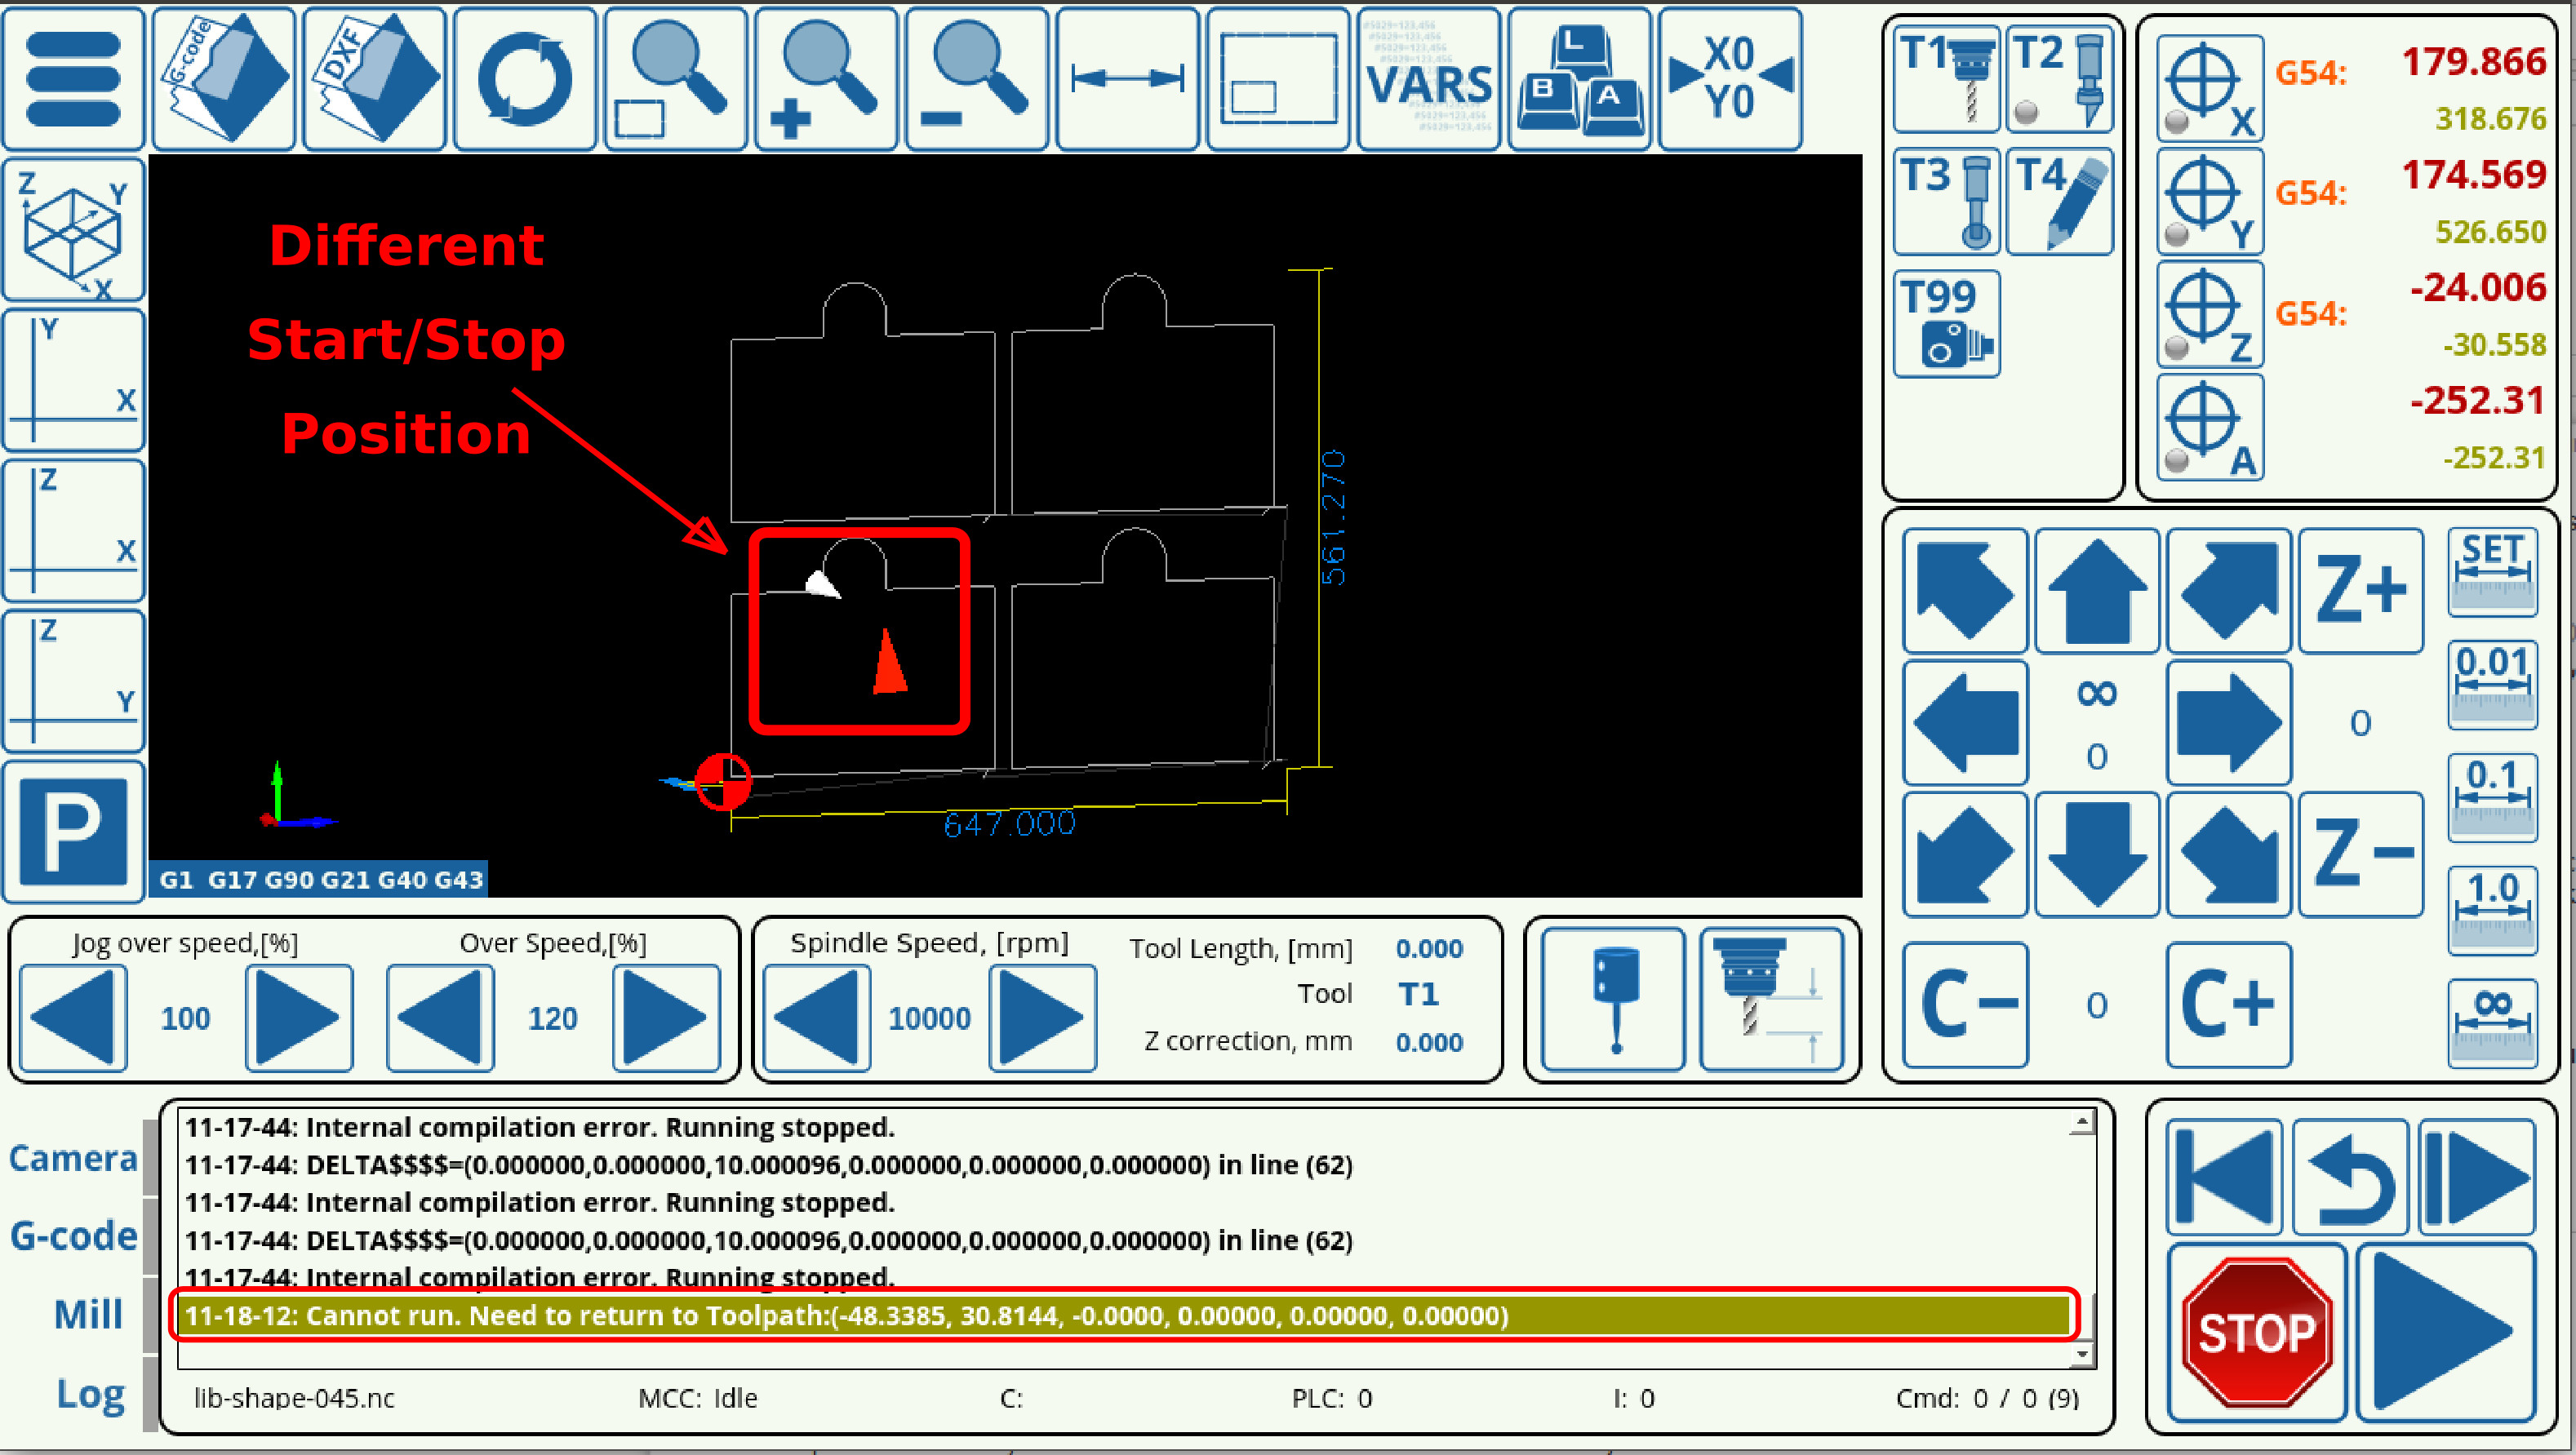
This will check the axes and, if any position values for each selected axis are different after the move, will stop the program when the Run button is pressed, as seen in the image below:
Option 2: Move back to stop position
The second option allows the operator to stop the machine, move the working tool to a desired position and then, after pressing the Run button, makes the machine automatically return to the original stopping position and resumes the cut from there. This is especially useful on large machines, where the operator may stop the machine in the middle of running the program to check the working tool and then has to move it closer in order to inspect it.
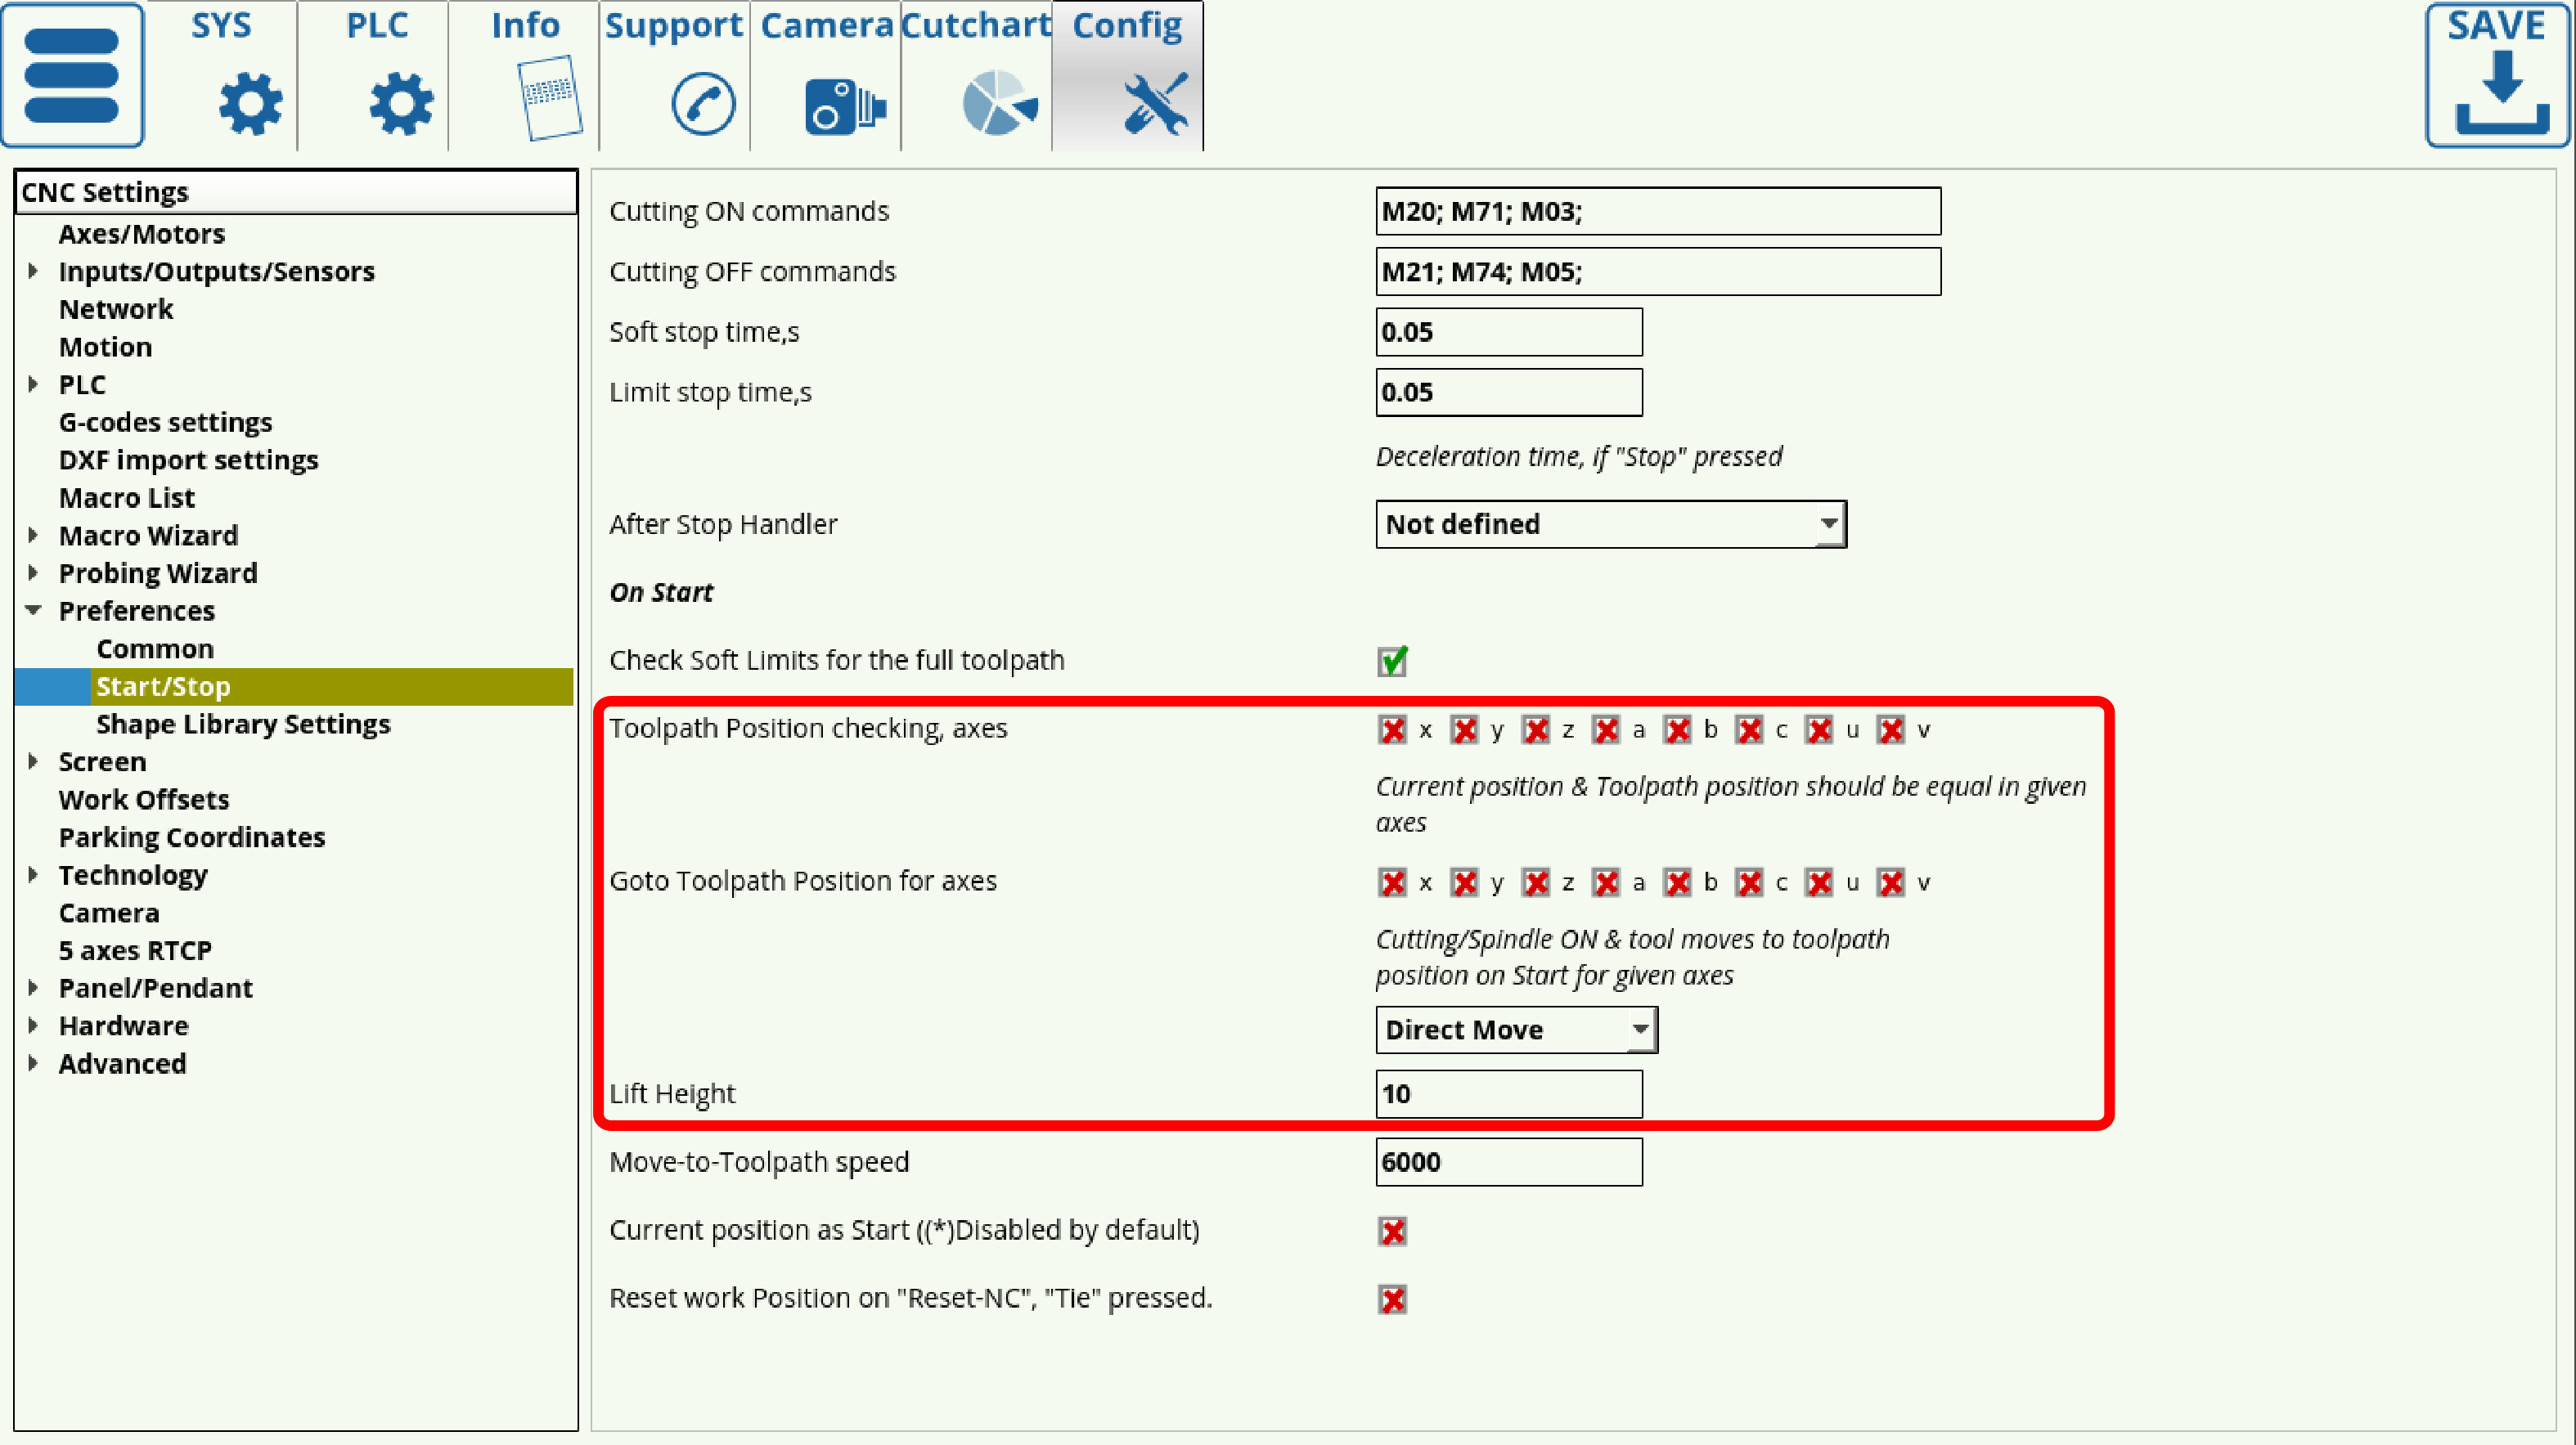
In order to set this option up, the user needs to select the particular axes for which the machine will check its position values and, if any of them are different from their position values at the stop point, the machine will move the working tool back in place. In the example below, axes x, y and z have been selected to go back to the original stopping point, therefor allowing the user to lift the tool and move it closer towards themselves, then pressing Run for the tool to move back:
The Lift Height has been set to be 15 mm, allowing the machine to lift the working tool before moving as to prevent any collision with the working part. Note that this value will be different depending on the specific part and machine configuration.
These two options can be set to be different for different axes - for example, the x- and y-axes can be set to return back to the original stopping point, while the z-axis can be set to block movement if the working tool has been moved up or down, as in the image below. Note however, that only one option is available for each specific axis.
Additional Notes
Start/stop can be performed via the 0xffffff (Stop) and 0xfffffe (Start) commands. For instance,
gvarset(0xffffff,1); //Stop Program
This can be used in procedures such as the HOMING_HANDLER Software PLC.
Additionally, the following global variables can be used:
| GVAR_EXT_REFRESH_NC | 100001 | refresh nc program |
| GVAR_EXT_PLAYER_PLAY | 100002 | play |
| GVAR_EXT_RESET_NC | 100003 | reset nc program |
Pause
As of December 2022, the myCNC firmware features the Pause functionality. This allows to:
- Adjust the Overspeed % to 0 (complete stop)
- Use the Pause button -
action=“player-pause”for pause/start
As opposed to the Stop button, which stop the program followed by the ability to start from the stop point, Pause is a smooth decrease in speed to zero without stopping the program execution. Essentially, the Pause brings the base frequency to a halt. When the frequency is brought back up, the process continues. This makes the Pause resemble a “sleep” mode.

