User Tools

Site Tools


mycnc:mycnc_setup_examples:plasma_cutting:1366p

This is an old revision of the document!


Plasma cutting profile 1366P

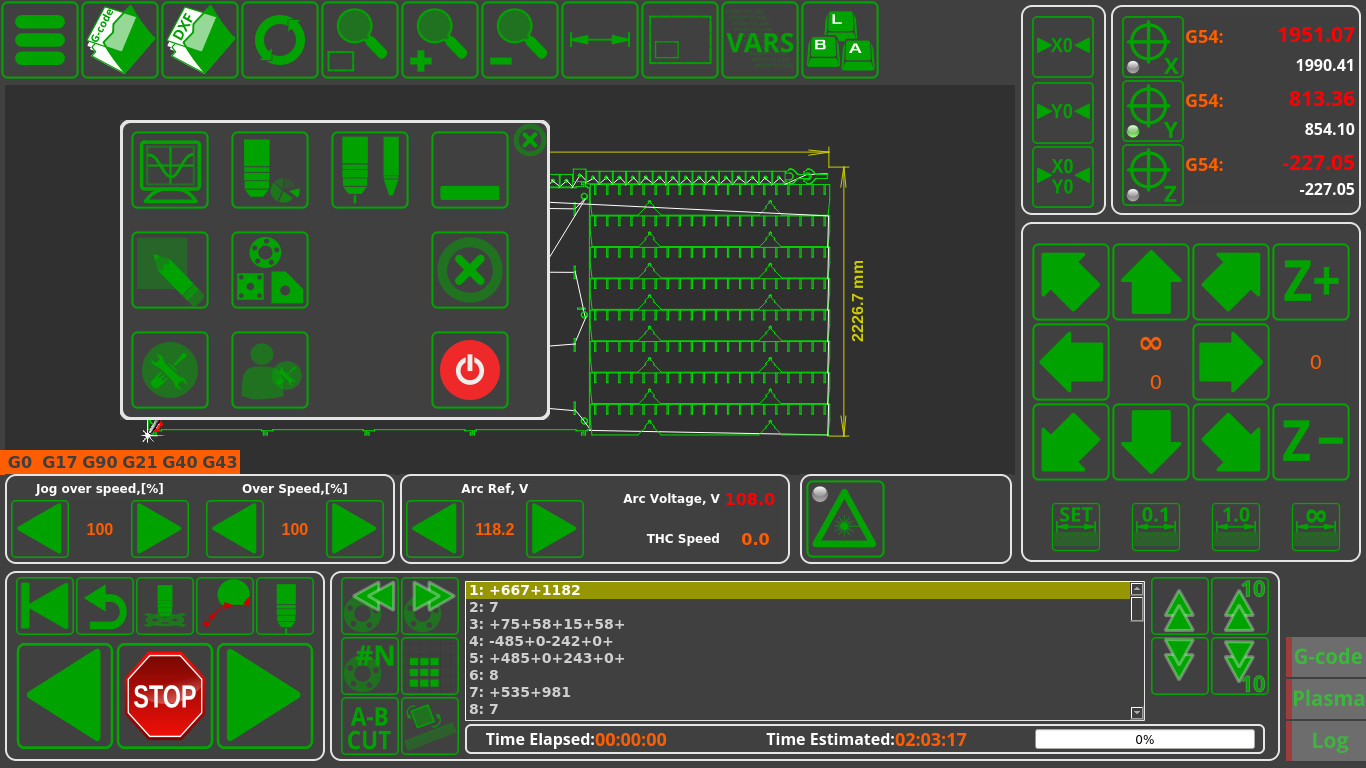
Upon loading myCNC software with the 1366P Plasma Cutting profile, you are presented with the following screen:

screen-1366p-002.jpg

Main Screen buttons

screen-1366p-003-main-window.jpg Go to the main configuration window
screen-1366p-004-gcode.jpg Open a G-code file
screen-1366p-005-dxf.jpg Open a DXF file
screen-1366p-006-reload-program.jpg Reload the program from the hard drive
screen-1366p-007-zoom-fit.jpg Zoom - Fit to Window
screen-1366p-008-zoom-in.jpg Zoom In
screen-1366p-009-zoom-out.jpg Zoom Out
screen-1366p-010-show-dimensions.jpg Show dimensions of the nesting chart
screen-1366p-011-work-area.jpg Show work area with the nesting chart
screen-1366p-012-vars-window.jpg Show VARS window
screen-1366p-013-virtual-keyboard.jpg Show the virtual keyboard
screen-1366p-014-minimize.jpg Minimize the myCNC software
screen-1366p-015-close.jpg Close myCNC software
screen-1366p-016-shutdown.jpg Shut down the workstation
screen-1366p-017-system-diagnostics.jpg Open the System Diagnostics window
screen-1366p-018-tool-configuration.jpg Tool configuration window
screen-1366p-019-technology-change.jpgTechnology change (plasma to gas cutting)
screen-1366p-020-open-editor.jpg Open the editor
screen-1366p-021-parts-library.jpg Common parts library
screen-1366p-022-settings.jpg Open Settings
screen-1366p-023-user-settings.jpg Open Custom Machine Settings /User Settings (See below)
screen-1366p-024-homing-x.jpg Run the homing for x-axis
screen-1366p-025-homing-y.jpg Run the homing for y-axis
screen-1366p-026-homing-xy.jpg Run the homing for xy-plane
screen-1366p-027-reset-x.jpg Reset to zero the working x-coordinate
screen-1366p-028-reset-y.jpg Reset to zero the working y-coordinate
screen-1366p-029-reset-z.jpg Reset to zero the working z-coordinate
screen-1366p-030-movement-xy.jpg Machine movement buttons (xy plane)
screen-1366p-031-movement-z-positive.jpg Machine movement button (positive z-axis)
screen-1366p-032-movement-z-negative.jpg Machine movement button (negative z-axis)
screen-1366p-033-distance-set.jpg Set the machine movement step size to a specified value
screen-1366p-034-distance-01.jpg Set the machine movement step size to 0.1 mm
screen-1366p-035-distance-1.jpg Set the machine movement step size to 1 mm
screen-1366p-036-distance-infinite.jpg Set an infinite machine movement step size
screen-1366p-037-reset-beginning.jpg Reset the operating point to the beginning of control program
screen-1366p-038-return-working-point.jpg Return to the working point
screen-1366p-039-bring-start-operating-point.jpg Binding of the start of the control program to operating point
screen-1366p-040.jpg Start cutting from this position
screen-1366p-041.jpg Enter simulation mode (ignore cutting commands) - see below
screen-1366p-042-go-back.jpg Go back
screen-1366p-043-stop.jpg Stop the program
screen-1366p-044-run.jpg Run the program
screen-1366p-042-go-back.jpg Go back
screen-1366p-043-stop.jpg Stop the program
screen-1366p-052-laser-pointer.jpg Switch the instrument to laser pointer

Part selection and editing

screen-1366p-046-previous-part.jpg Go to previous part
screen-1366p-045-next-part.jpg Go to next part
screen-1366p-047-specific-part.jpg Go to a specific part number
screen-1366p-048-cloning.jpg Open part cloning window
screen-1366p-049-ab-cut.jpg Cut from point A to point B
screen-1366p-050-rotate.jpg Open part rotation window

Custom Machine Settings (User Settings)

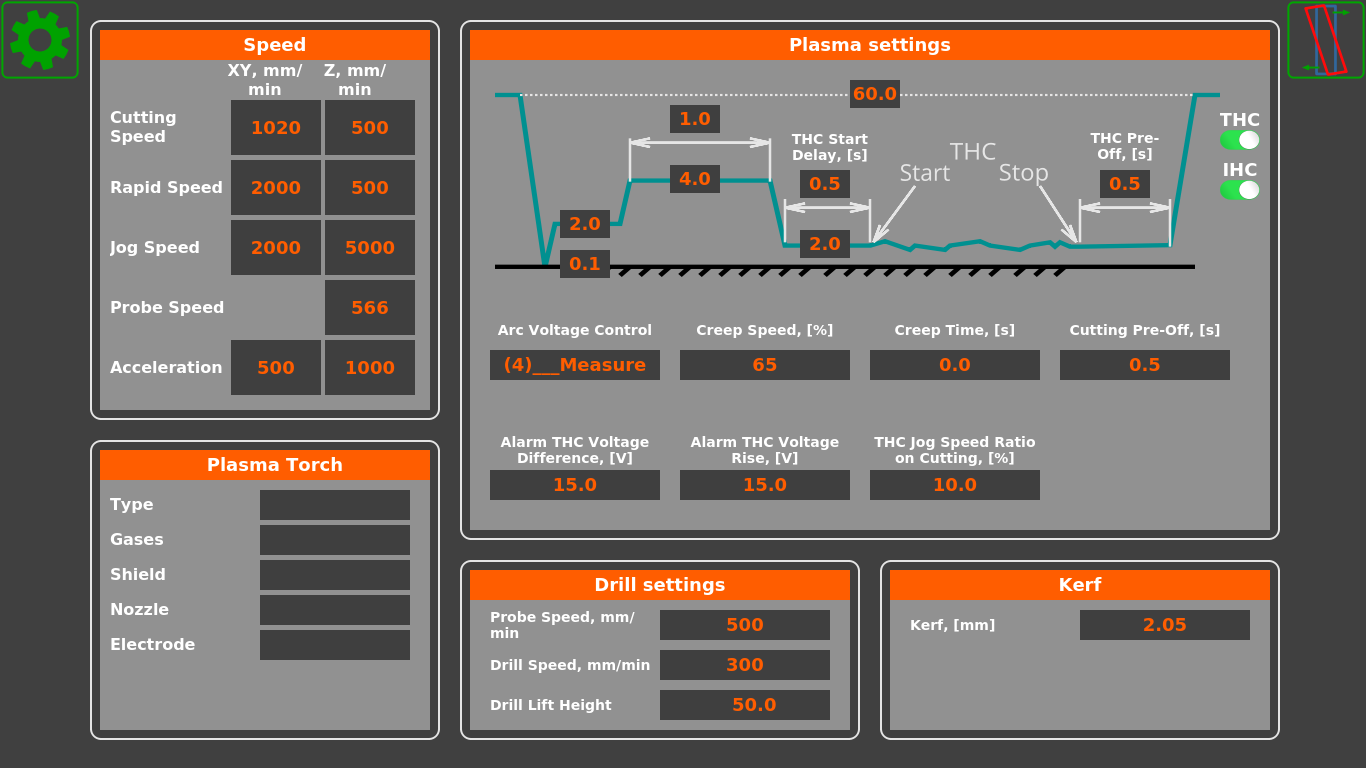
Upon opening the Custom Machine Settings for the 1366P profile, you are presented with the following screen:

This settings window allows to specify the distances within the plasma cutting cycle, as well as functions such as THC and IHC. It also serves as the quick settings window which is always accessible to the operator, as opposed to the general settings, which might be open or closed to the operator depending on the software configuration that the user decides to employ.

Progress bar

The progress bar for the control program is present in the latest versions of myCNC plasma cutting software.

screen-1366p-051-progress-bar.jpg

The bar shows time elapsed, estimated time remaining for the entire program, and the percent progress bar for quick visual reference.

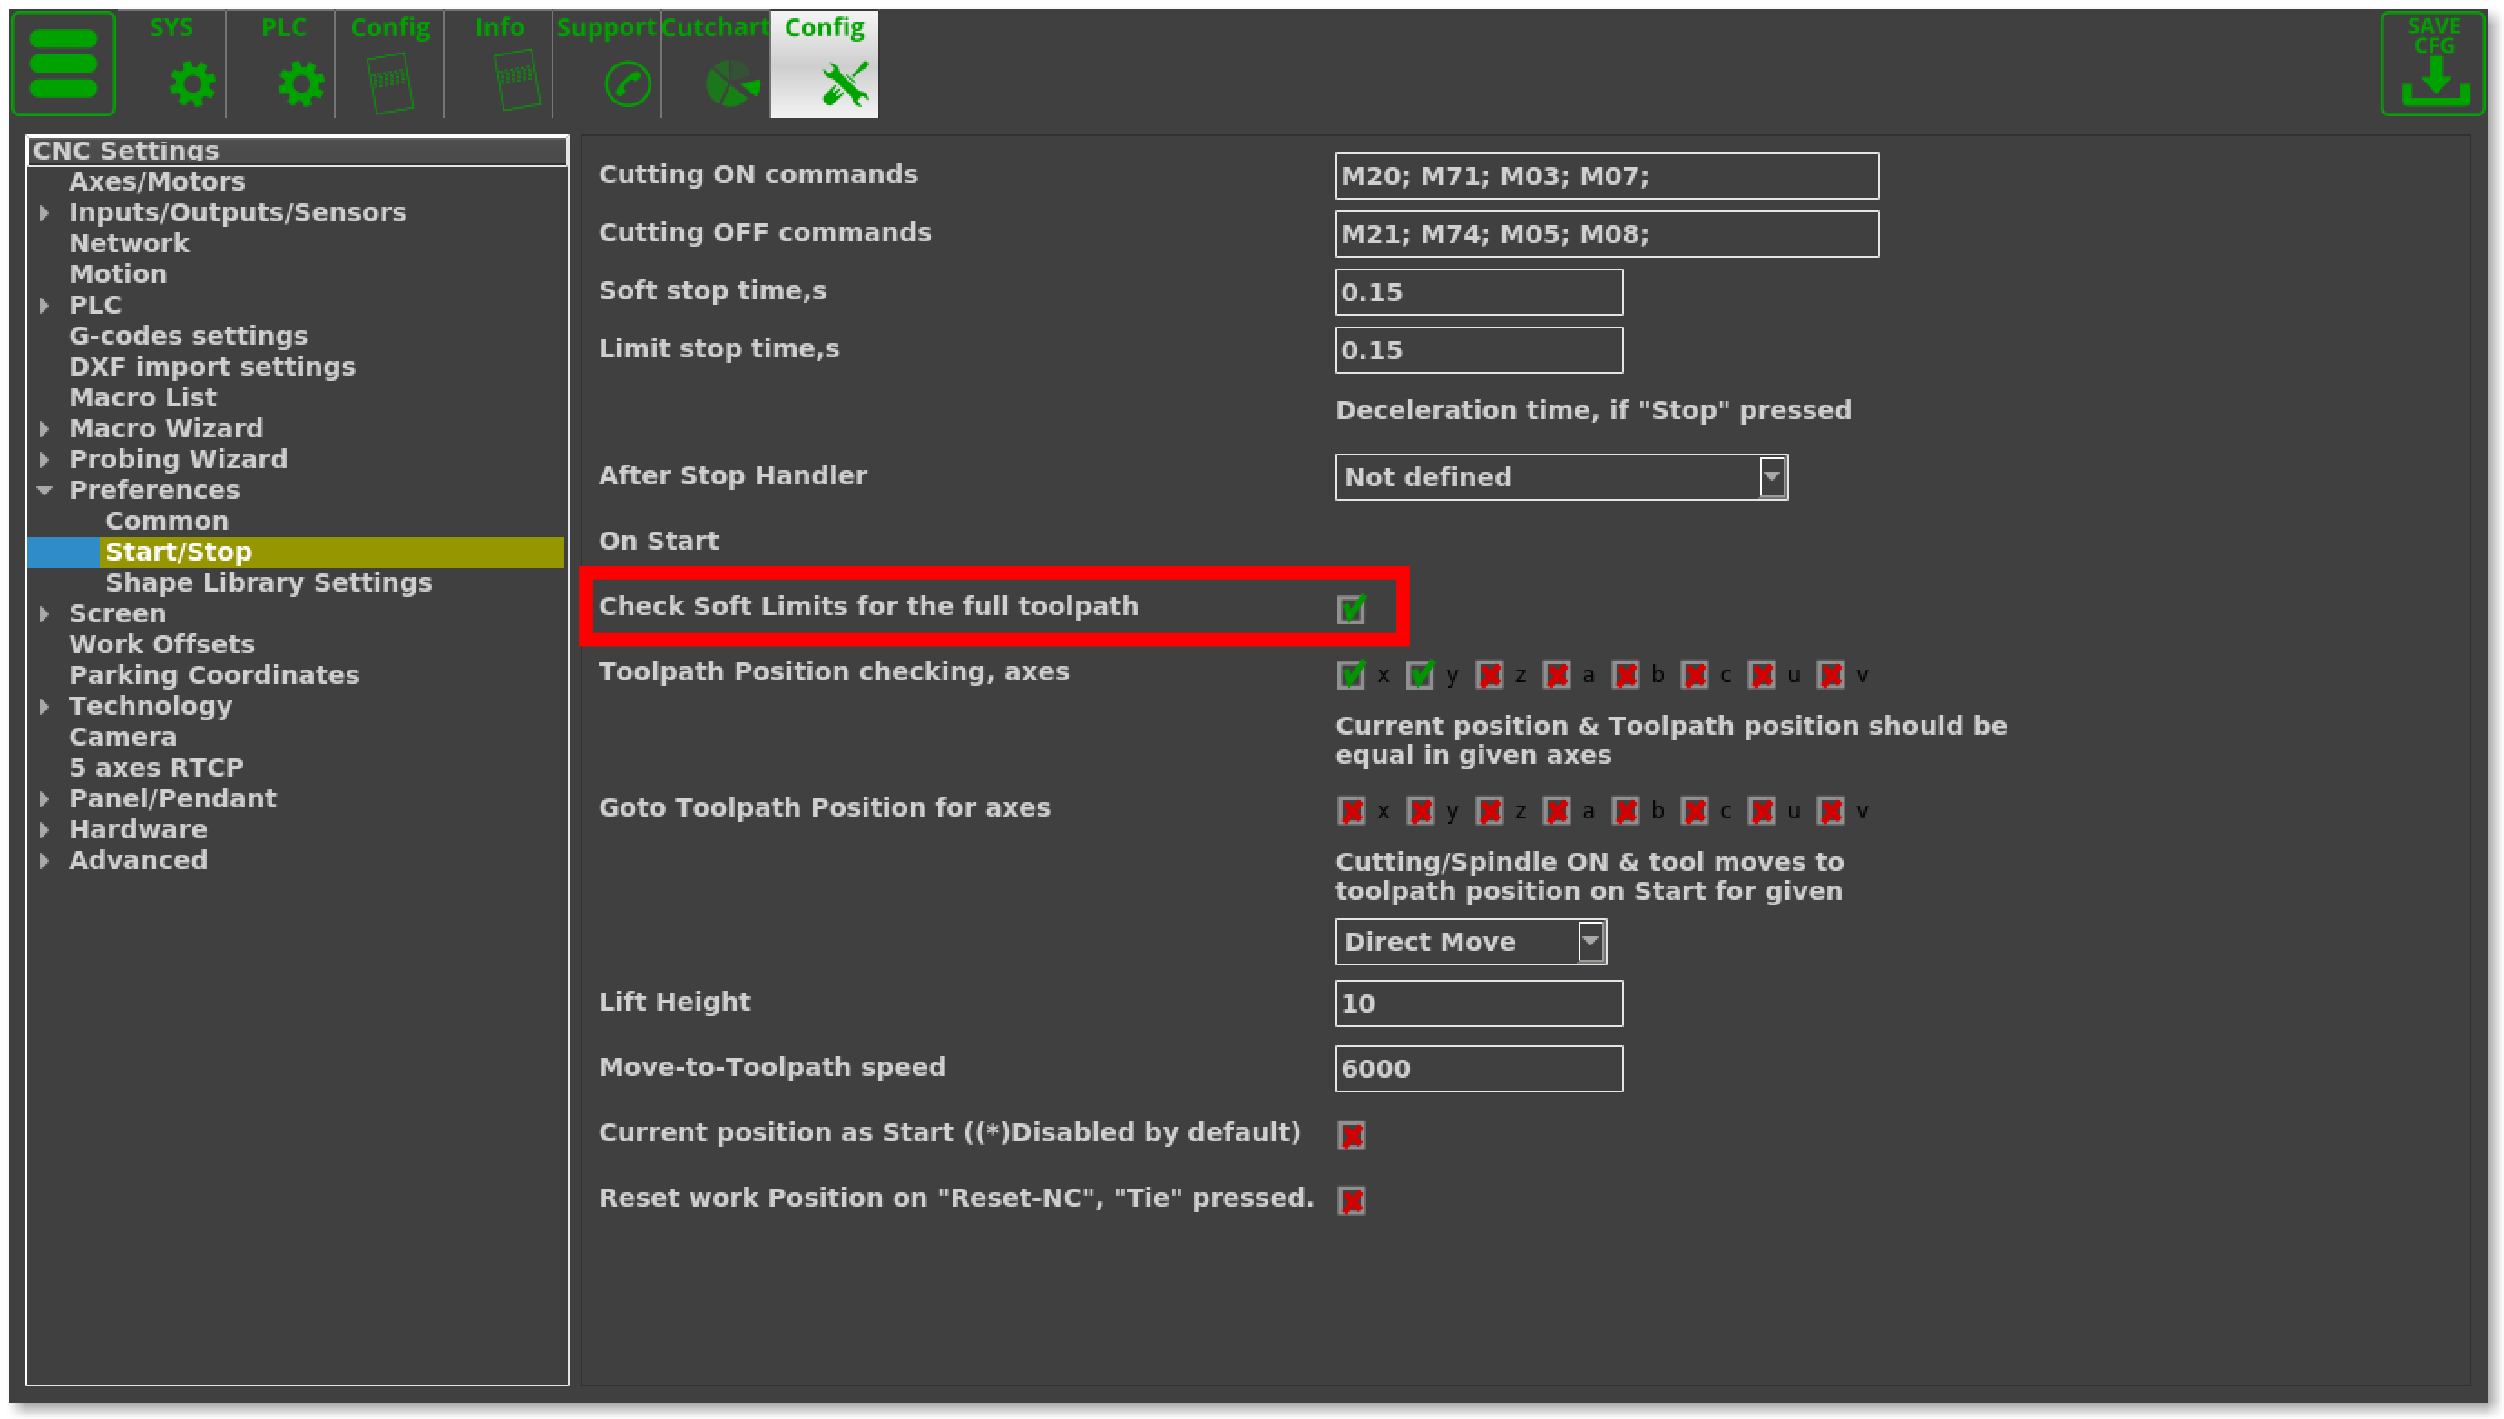
Note that the progress bar will only work properly if the following setting is turned ON: “Check Soft Limits for the full toolpath” in Settings > Preferences > Start/Stop.

Simulation mode - ignore cutting commands

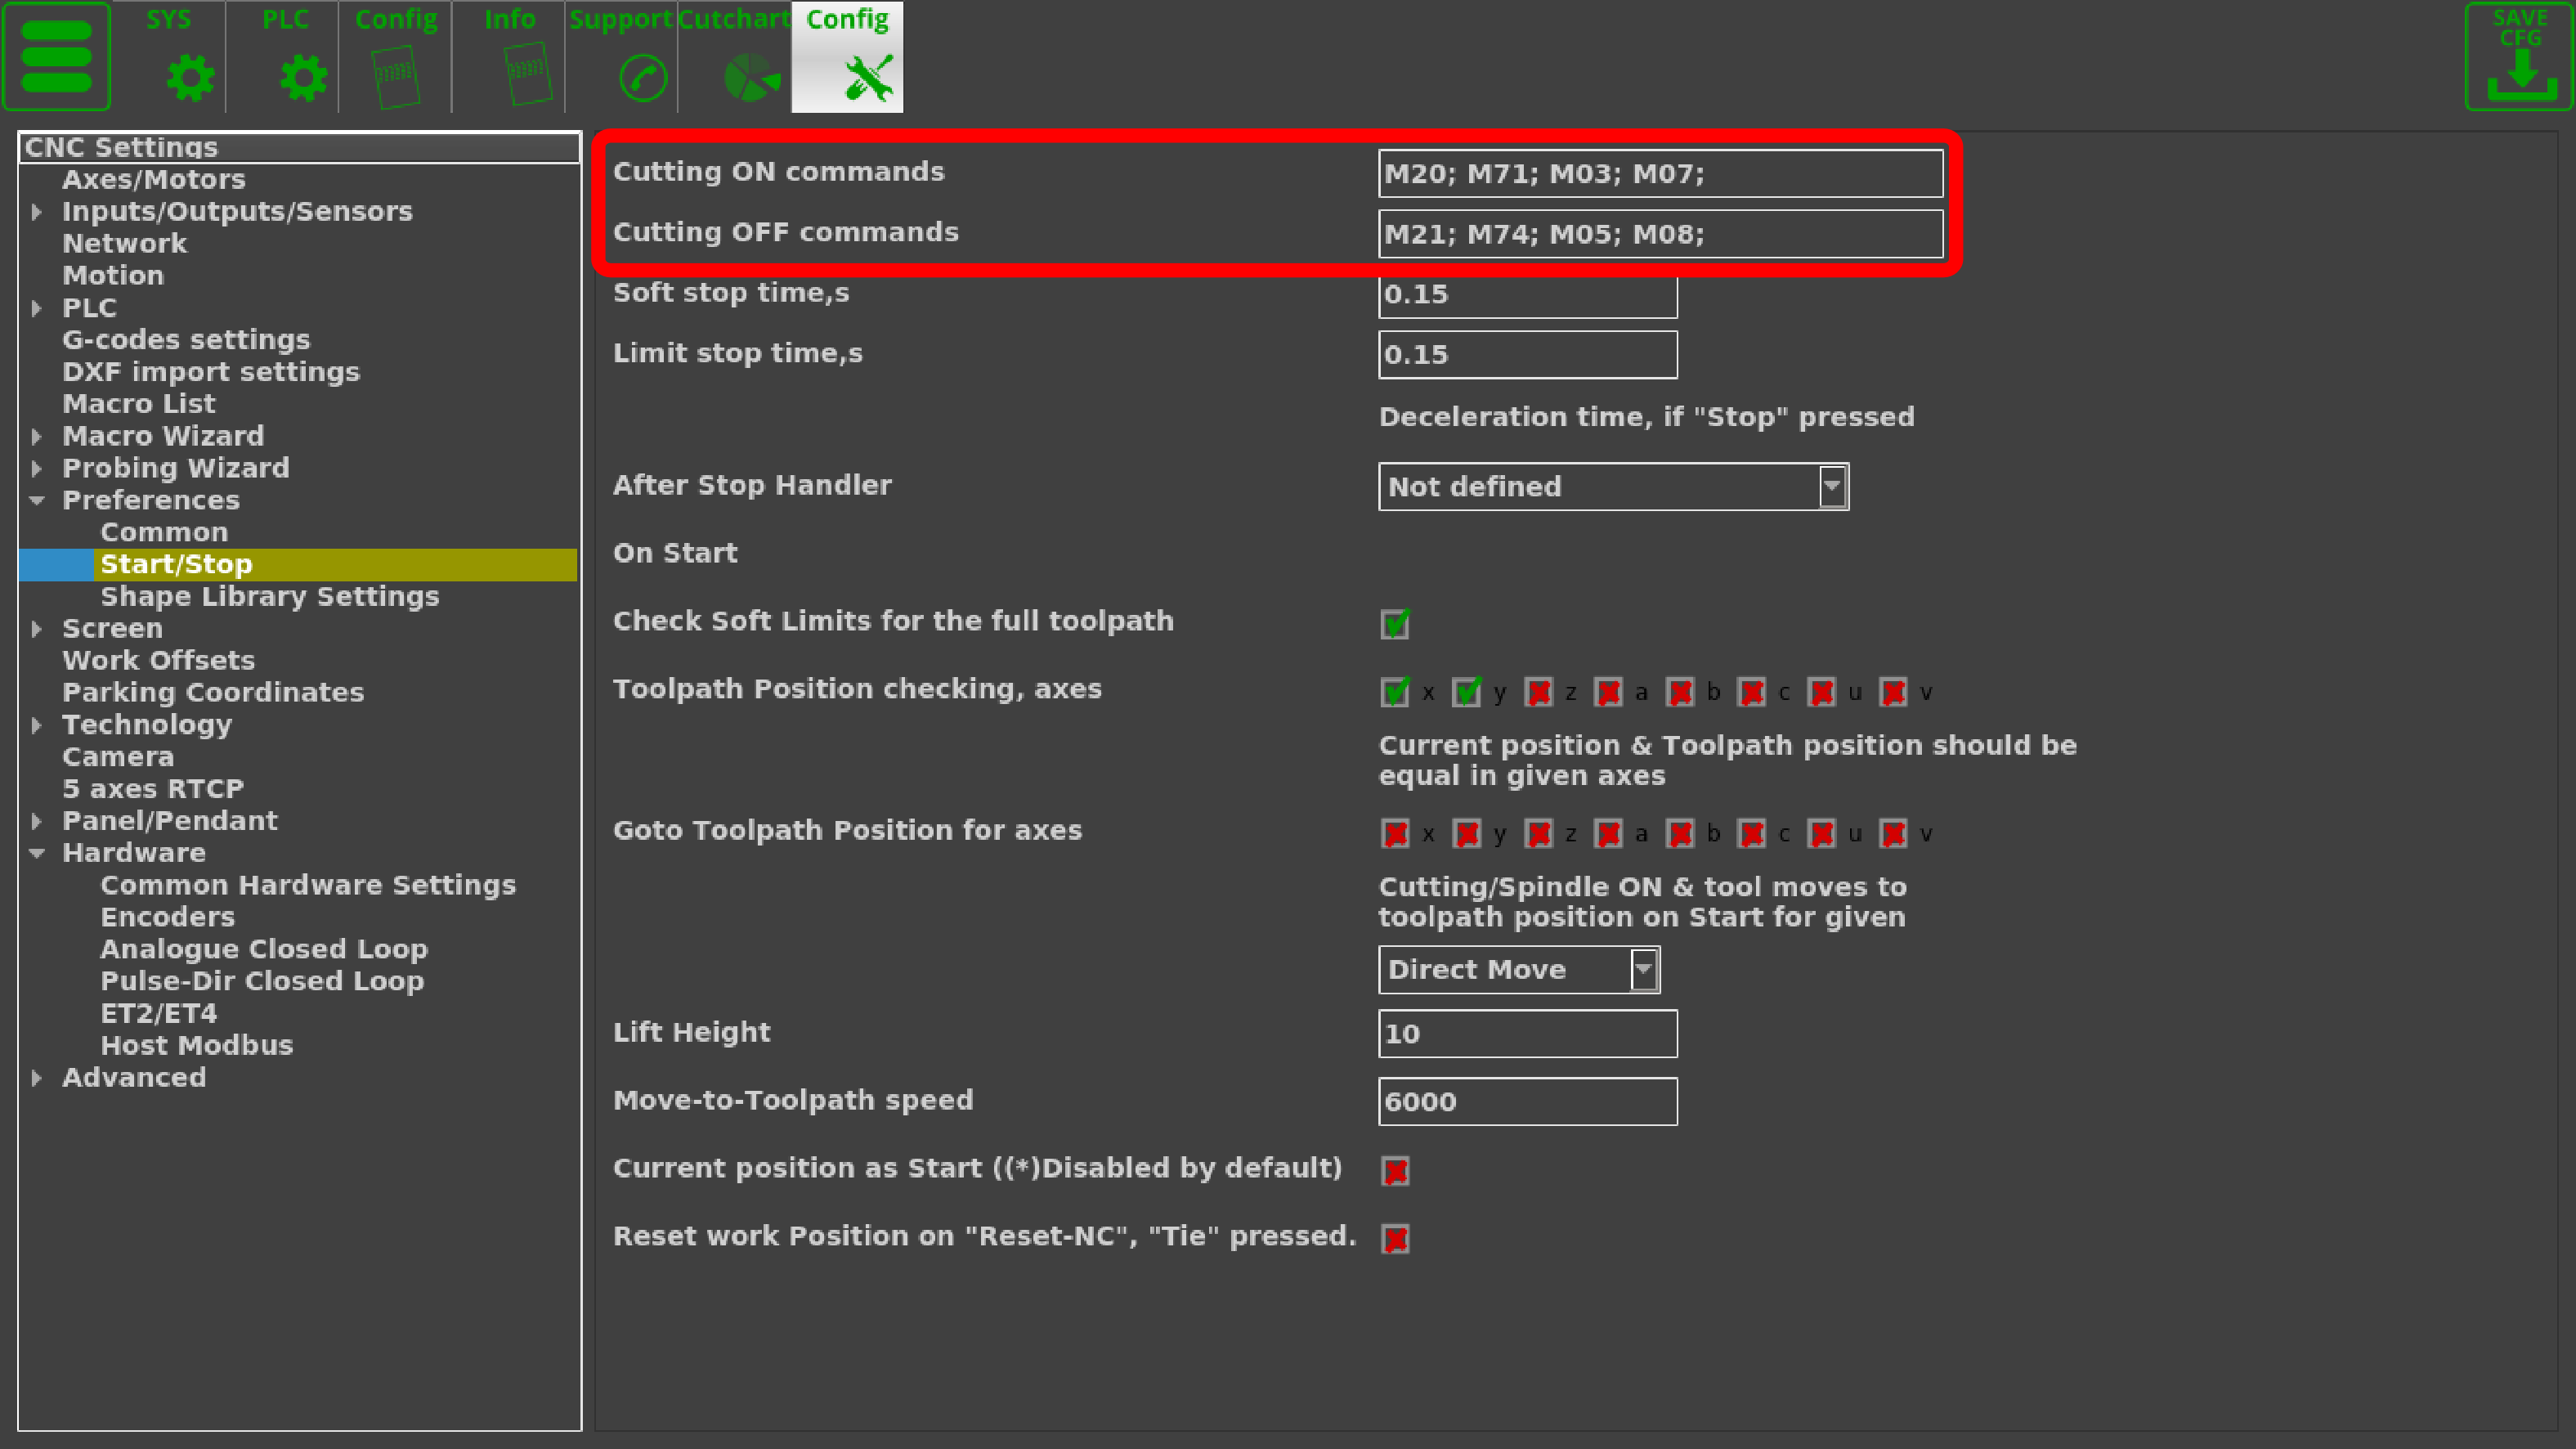
With the simulation mode turned ON, the software will ignore the cutting commands, simply moving the working bit (plasma torch, laser pointer, etc) around to give the user an option of running the program before the actual cutting begins. The commands which the myCNC software will ignore can be specified in the Settings > Config > Preferences > Start/Stop, as seen in the image below:

mycnc/mycnc_setup_examples/plasma_cutting/1366p.1561135058.txt.gz · Last modified: 2019/06/21 12:37 by ivan
Donate Powered by PHP Valid HTML5 Valid CSS Driven by DokuWiki