Table of Contents
Setting up the probe tool
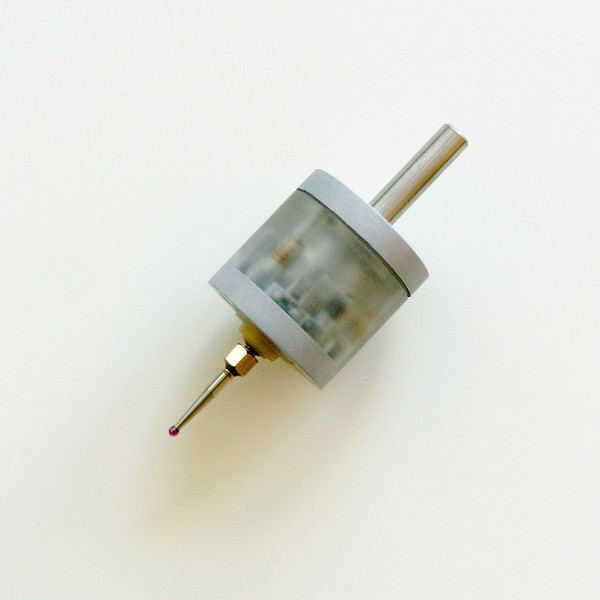
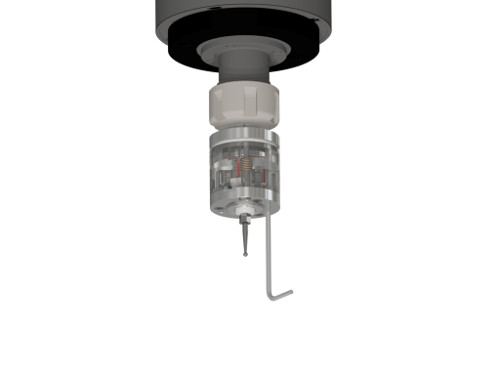
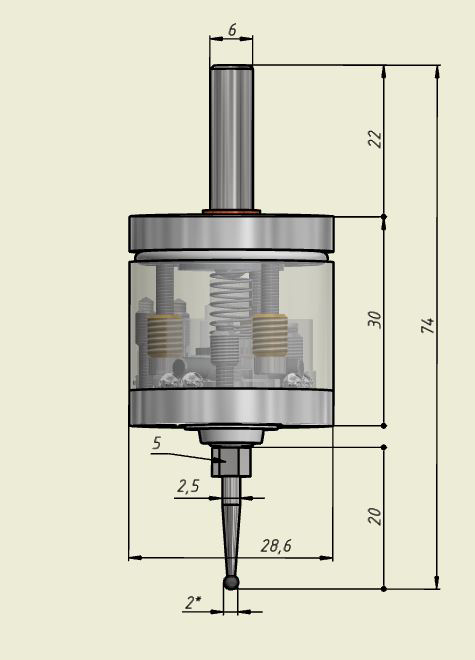
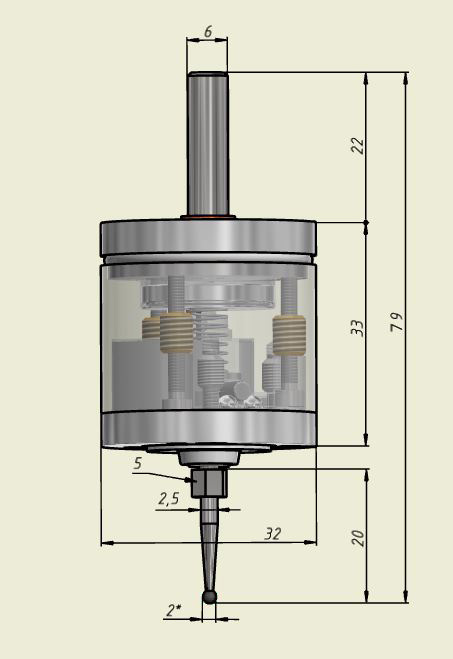
The probe tool below is included in of some myCNC kits (NOTE: As of August 2021, the probe tool is no longer sold as part of our kits). The main sensor looks like the image below:
This manual covers the basic setup of the probe that can be used in a number of myCNC profiles and applications in order to determine an exact position of the part on a milling machine. The probe can find edges, corners, hole centers, and more.
Calibration/Adjustment of the probe sensor
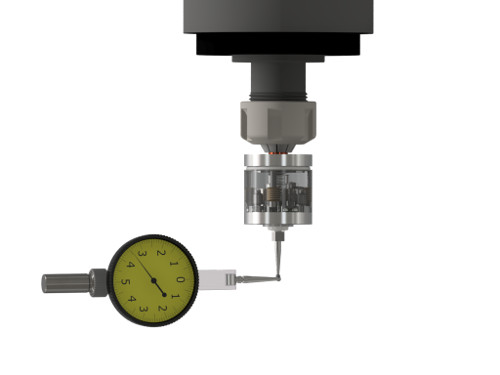
In order to properly adjust the probe before starting the measurement procedure, it is necessary to eliminate any deviation that might be otherwise present in the probe. For this purpose, an indicator is used, as shown in the image below. This indicator should be sensitive to small forces of about 0.3-0.5H.
The spindle axis is moved by hand, and the amplitude of the sensor deviation is recorded using the indicator.
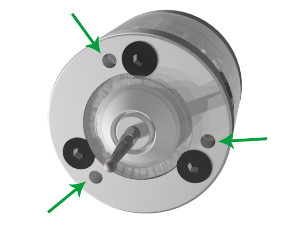
The deviation is eliminated by turning the M2.5 adjustment screws (shown in the image below) with the 2mm hex key provided in the probe kit:
It is recommended to hold the hex key by its short lever as shown in the image below, in order to prevent excessive force application. It might be necessary to perform several cycles of spindle calibration to adjust the probe to have the minimum acceptable deviation.
Connection to the myCNC board
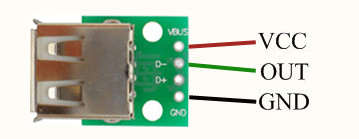
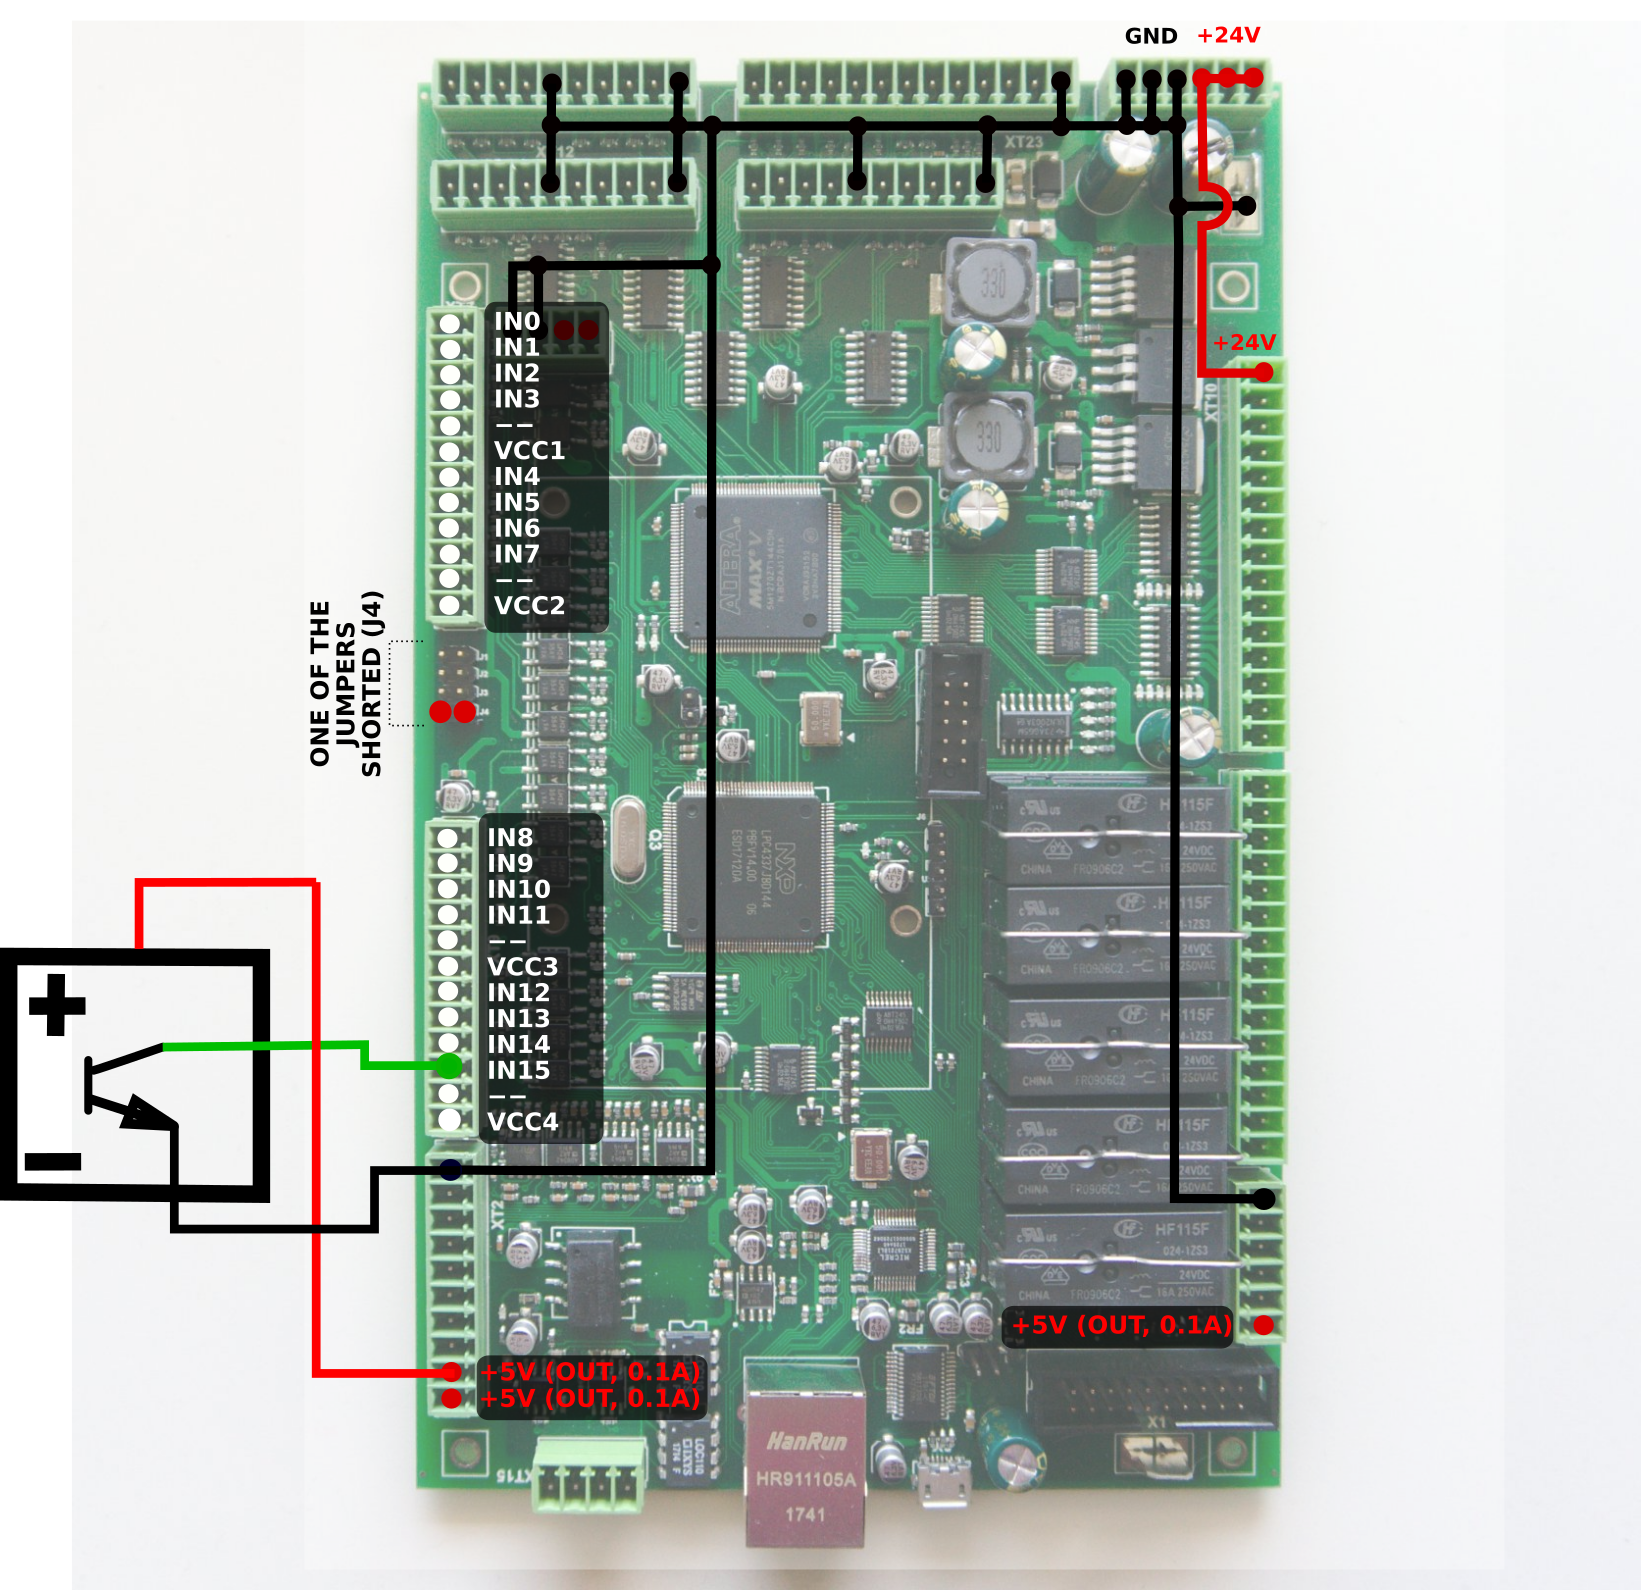
In order to set up this probe sensor with a myCNC controller, please consult the diagrams below. Note that while the setup is shown in one particular configuration on the ET7 myCNC control board, it can be replicated on other boards and in other connection configurations as well:
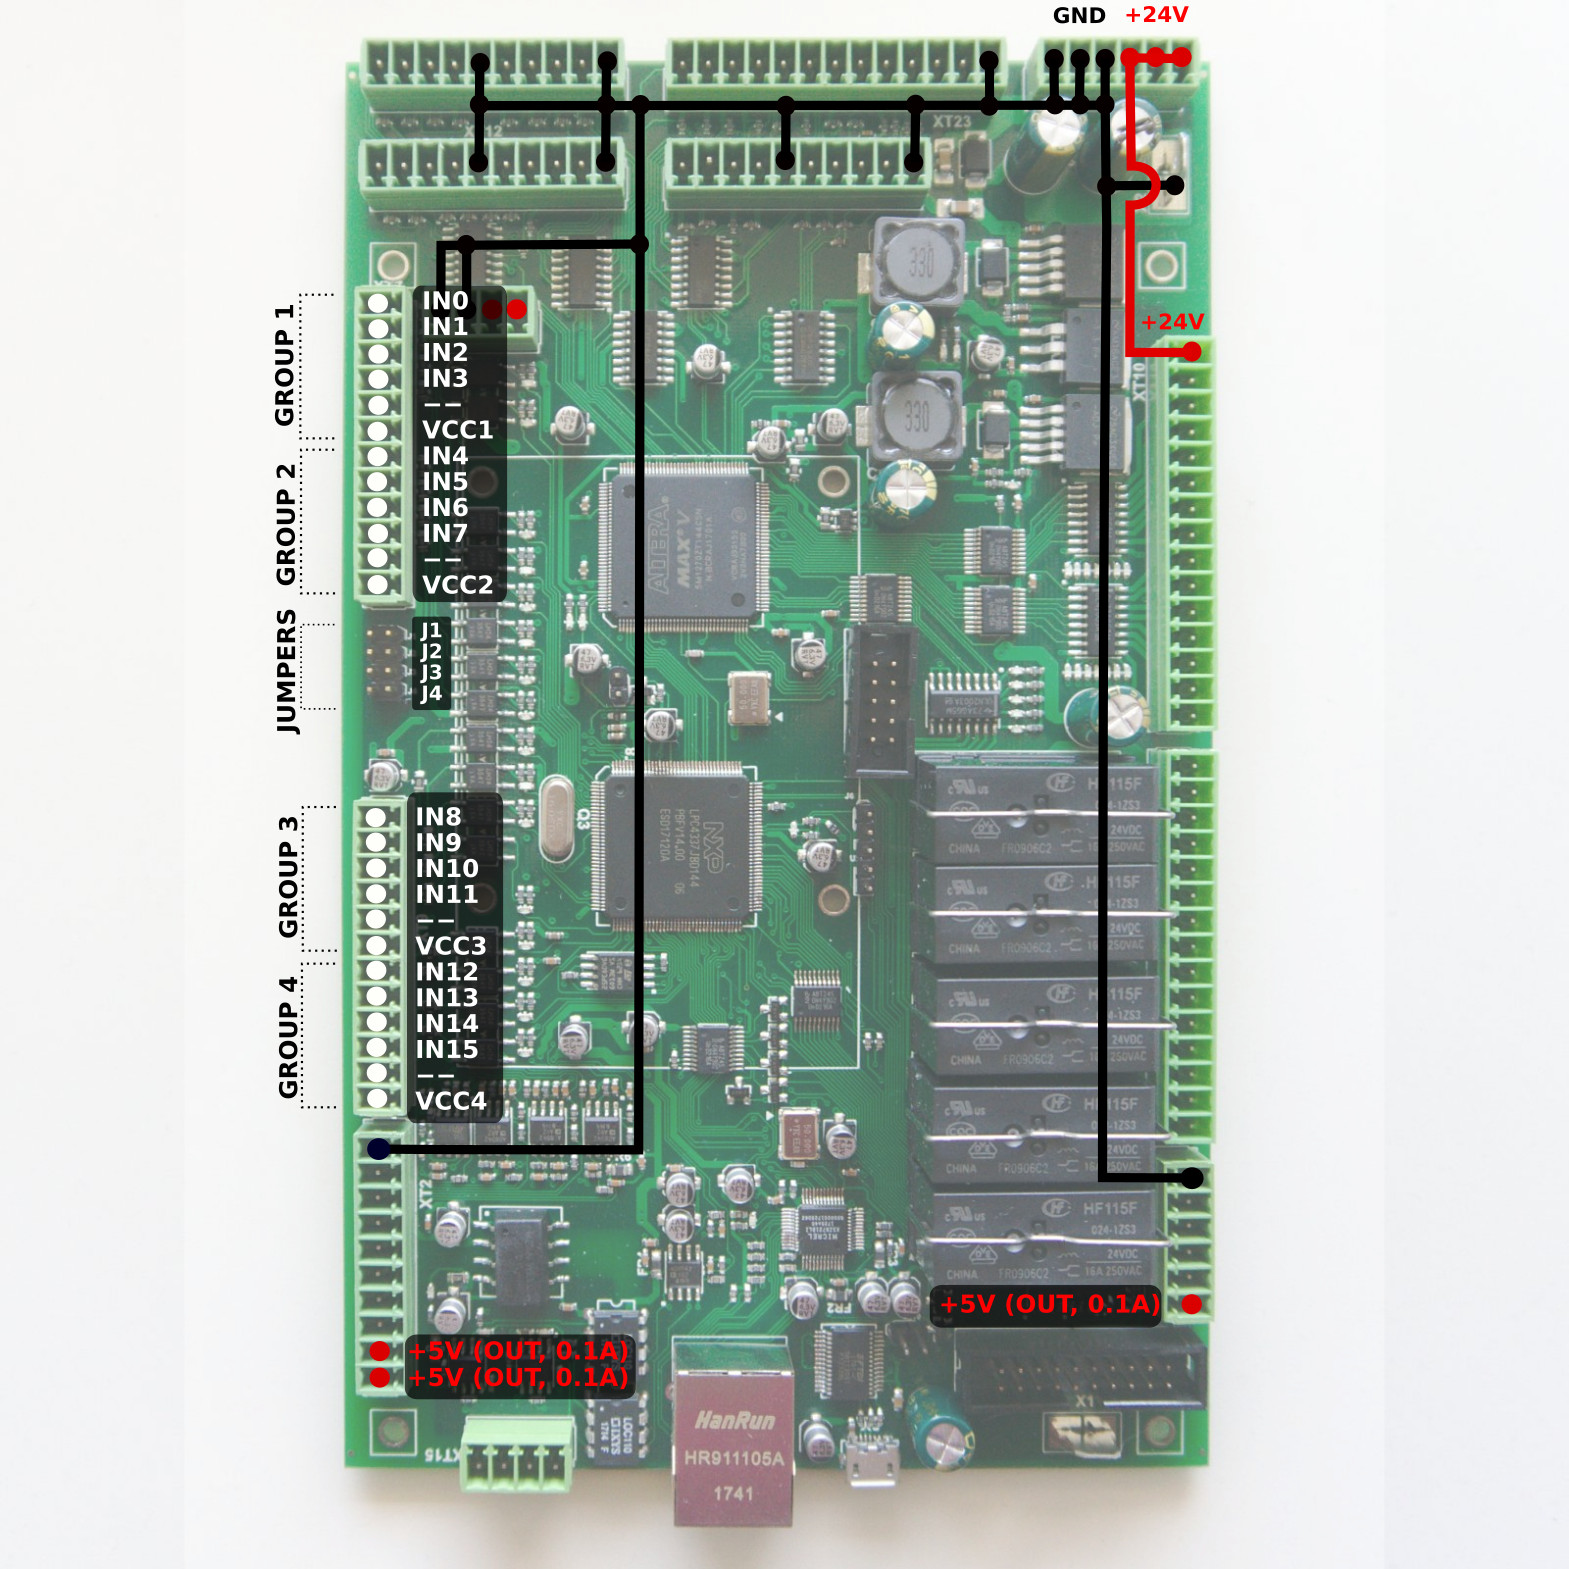
NOTE: The IN group of connectors used in this example is Group 4, as shown in the diagram below. Therefore, in this particular example, Jumper 4 is closed in order to supply power to Group 4. In your particular setup, please close the proper jumper for each respective group.
Probing Wizard Setup
A video recap of the probing wizard setup instructions is available on our YouTube channel:
In order to properly set up a probe system from scratch on your machine (especially if the software has not, for any reason, been updated to its latest version) please check the following:
1. In order to specify the particular port that you are using for your sensor, go to Go to CNC Settings > Probing Wizard > Probing Config and click the Enable Probe sensor protection/M109 button after setting the particular port desired (Port 9 for this example). This port can be any of the input ports that are available on your control board, as there isn't a dedicated probing port assigned by default. This setting will be automatically mirrored in the CNC Settings > Triggers/Timers window. After pressing the Enable Probe Sensor button, some necessary commands such as M108, M109 and TRIG04 will be automatically set up.
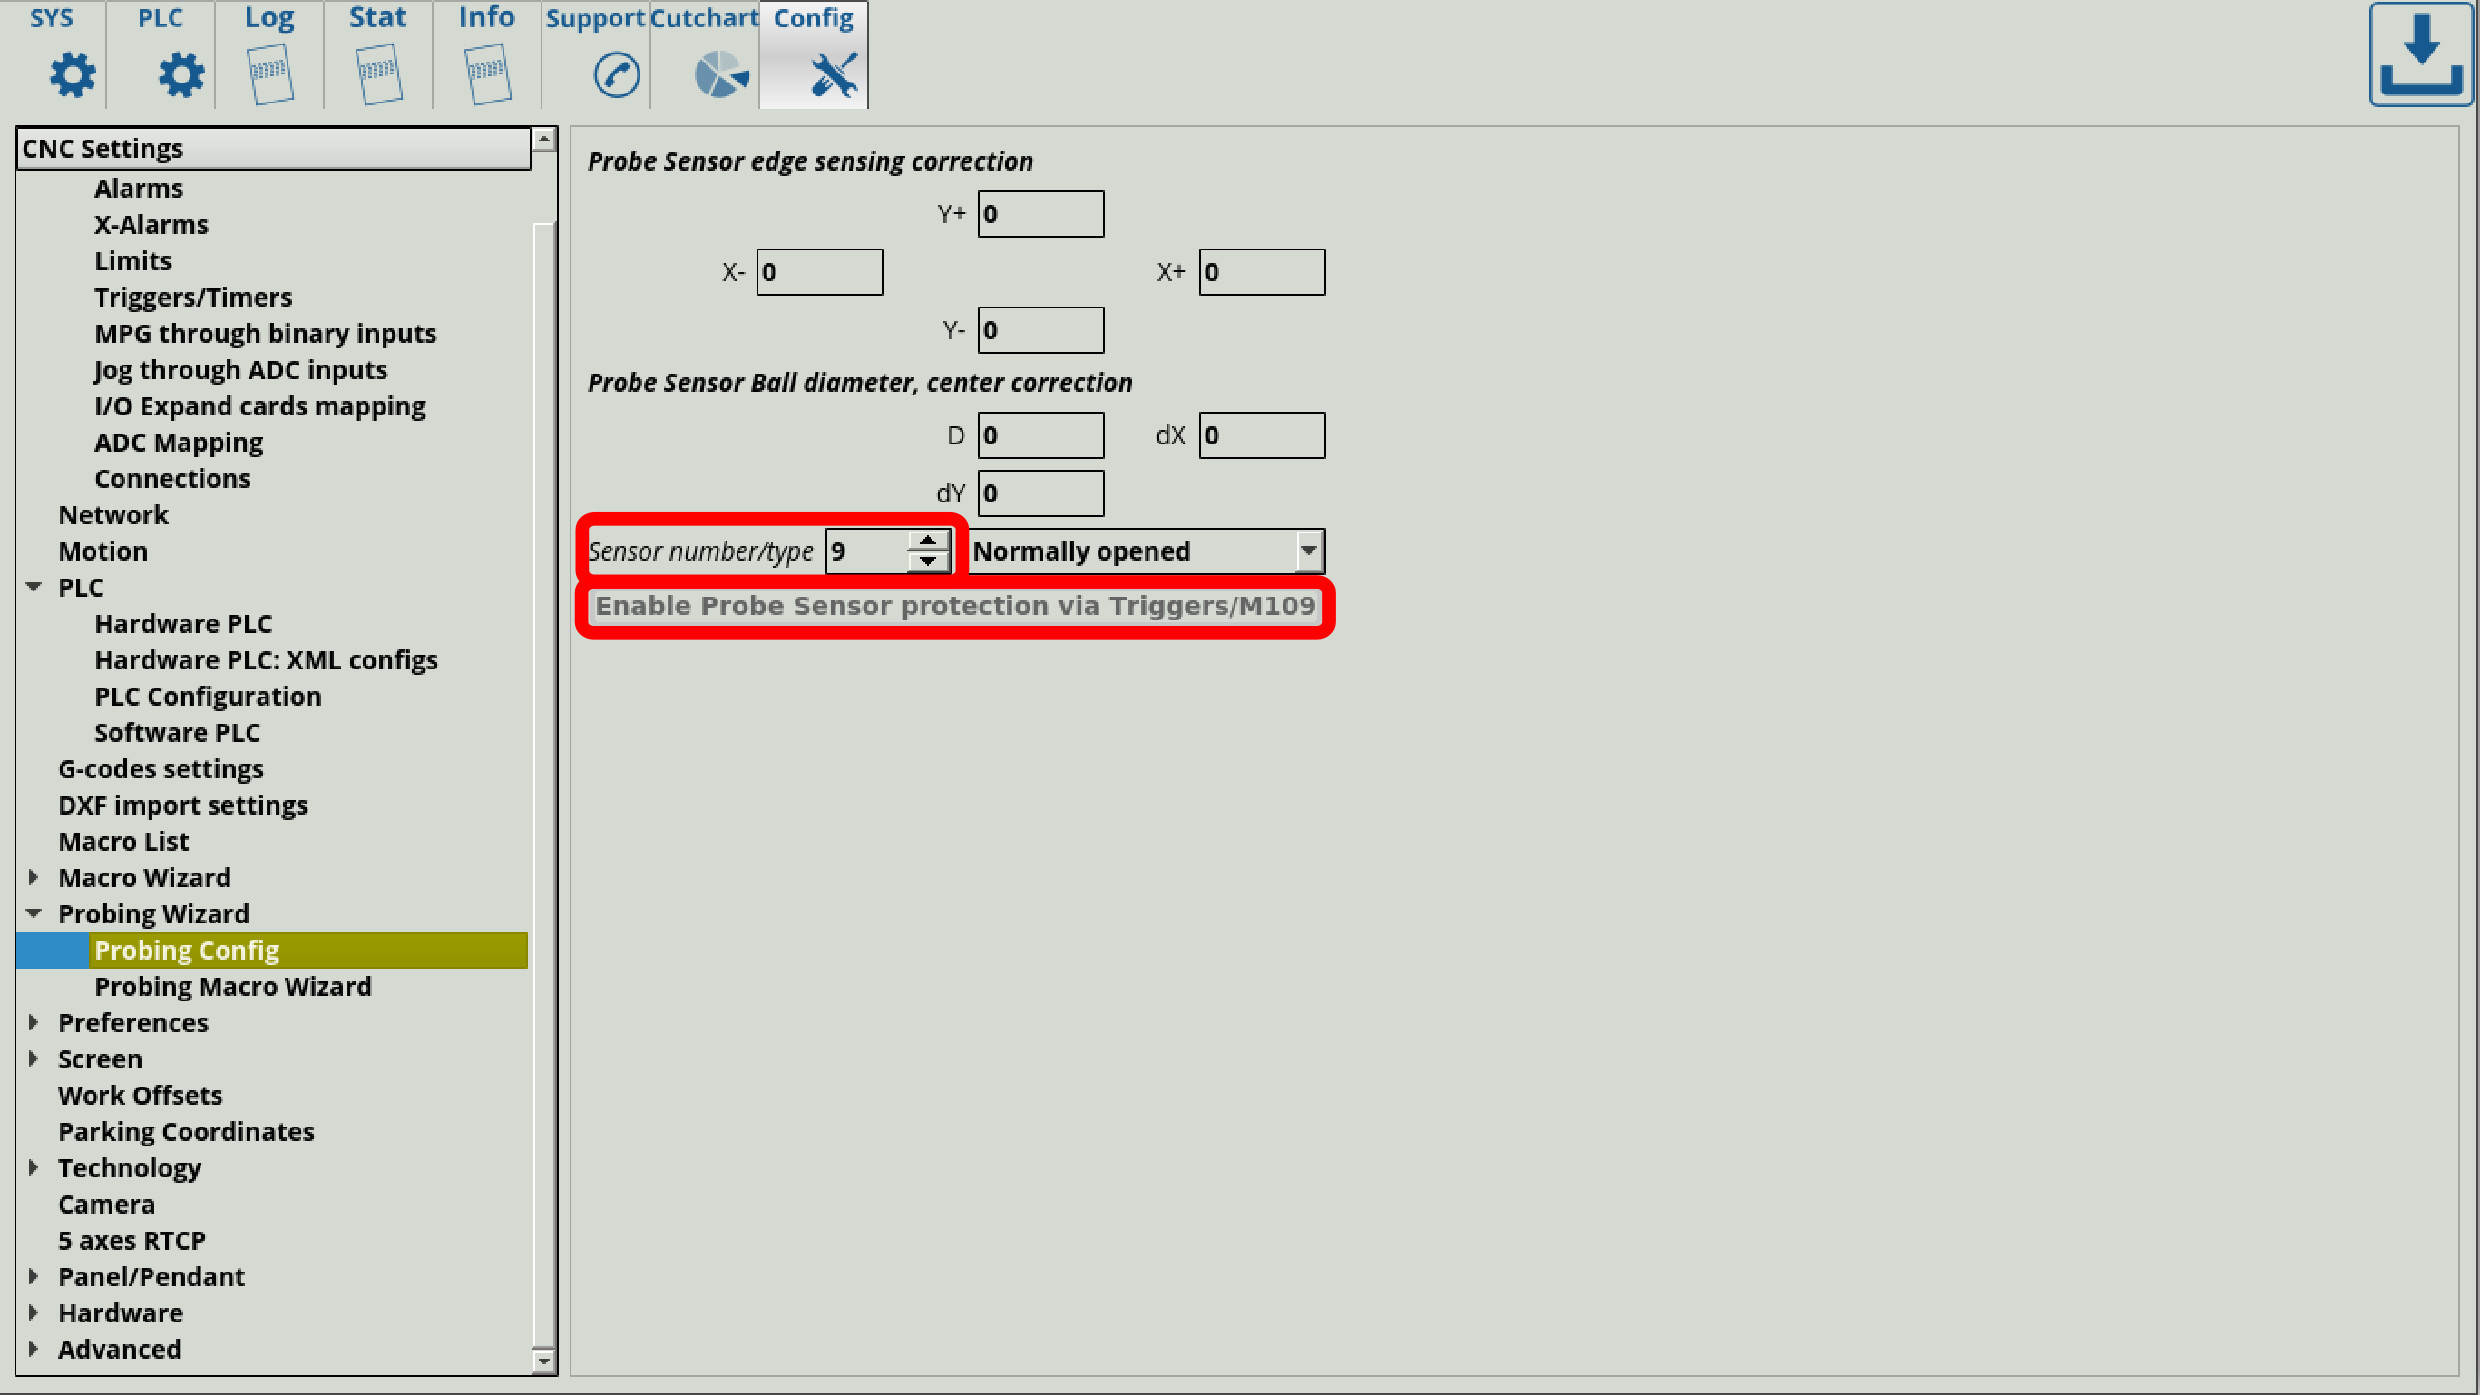
NOTE: The port should always be specified to be normally open in the above window. If the sensor port is normally closed, then it can be inverted in Hardware Settings and set to be “normally open” in the probing config window (with the Rising Edge trigger in Triggers/Timers).
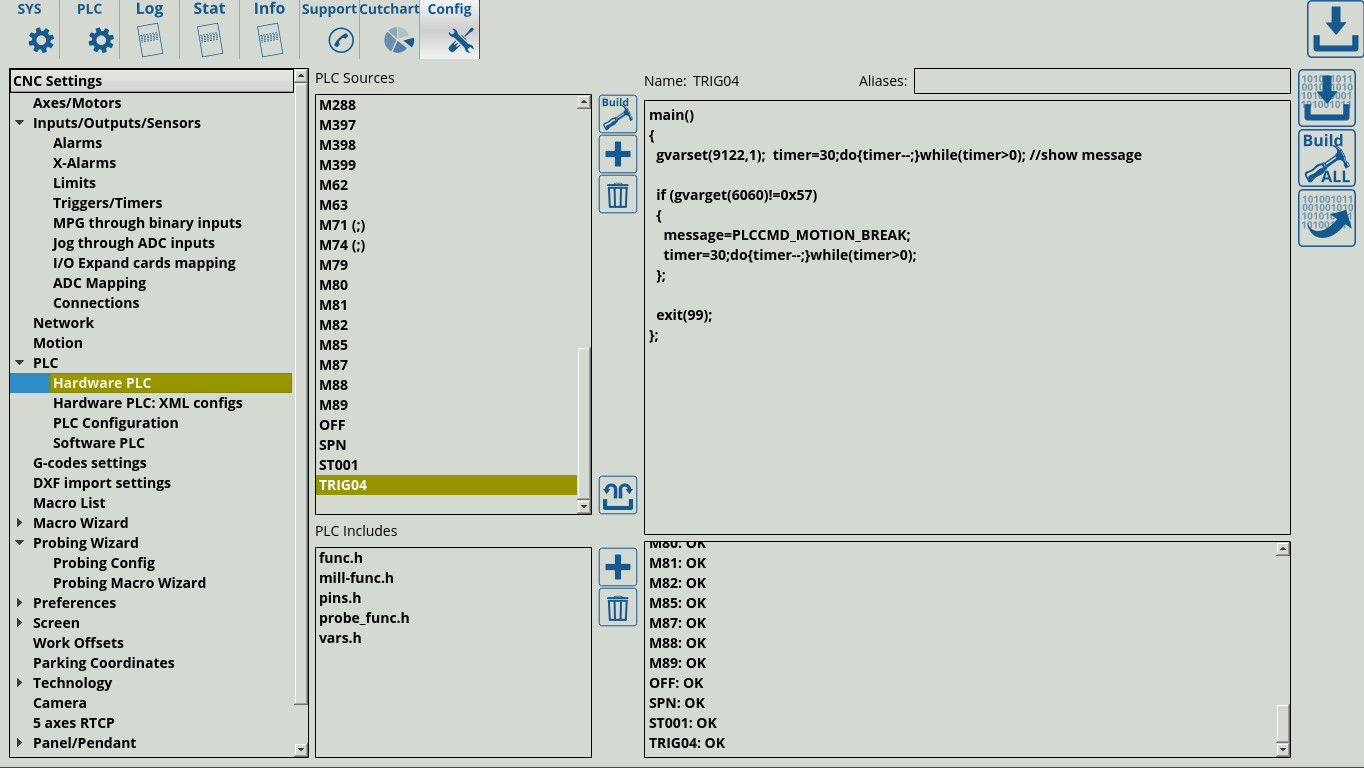
2. In CNC Settings > PLC > Hardware PLC, check that the command TRIG04 is created. The program should contain the following code:
main()
{
  gvarset(9122,1);  timer=30;do{timer--;}while(timer>0); //show message

  if (gvarget(6060)!=0x57)
  {
    message=PLCCMD_MOTION_BREAK;
    timer=30;do{timer--;}while(timer>0);
  };

  exit(99);
};
Add the TRIG04 command manually if it has not been generated automatically (typically not necessary).
3. In CNC Settings > Probing Wizard > Probing Macro Wizard, click Generate All Probing Macros and Generate PLC Probing procedure M288. Among other settings, this generates the necessary windows for the popup screens of the probe sensor (popup 21 and 22).
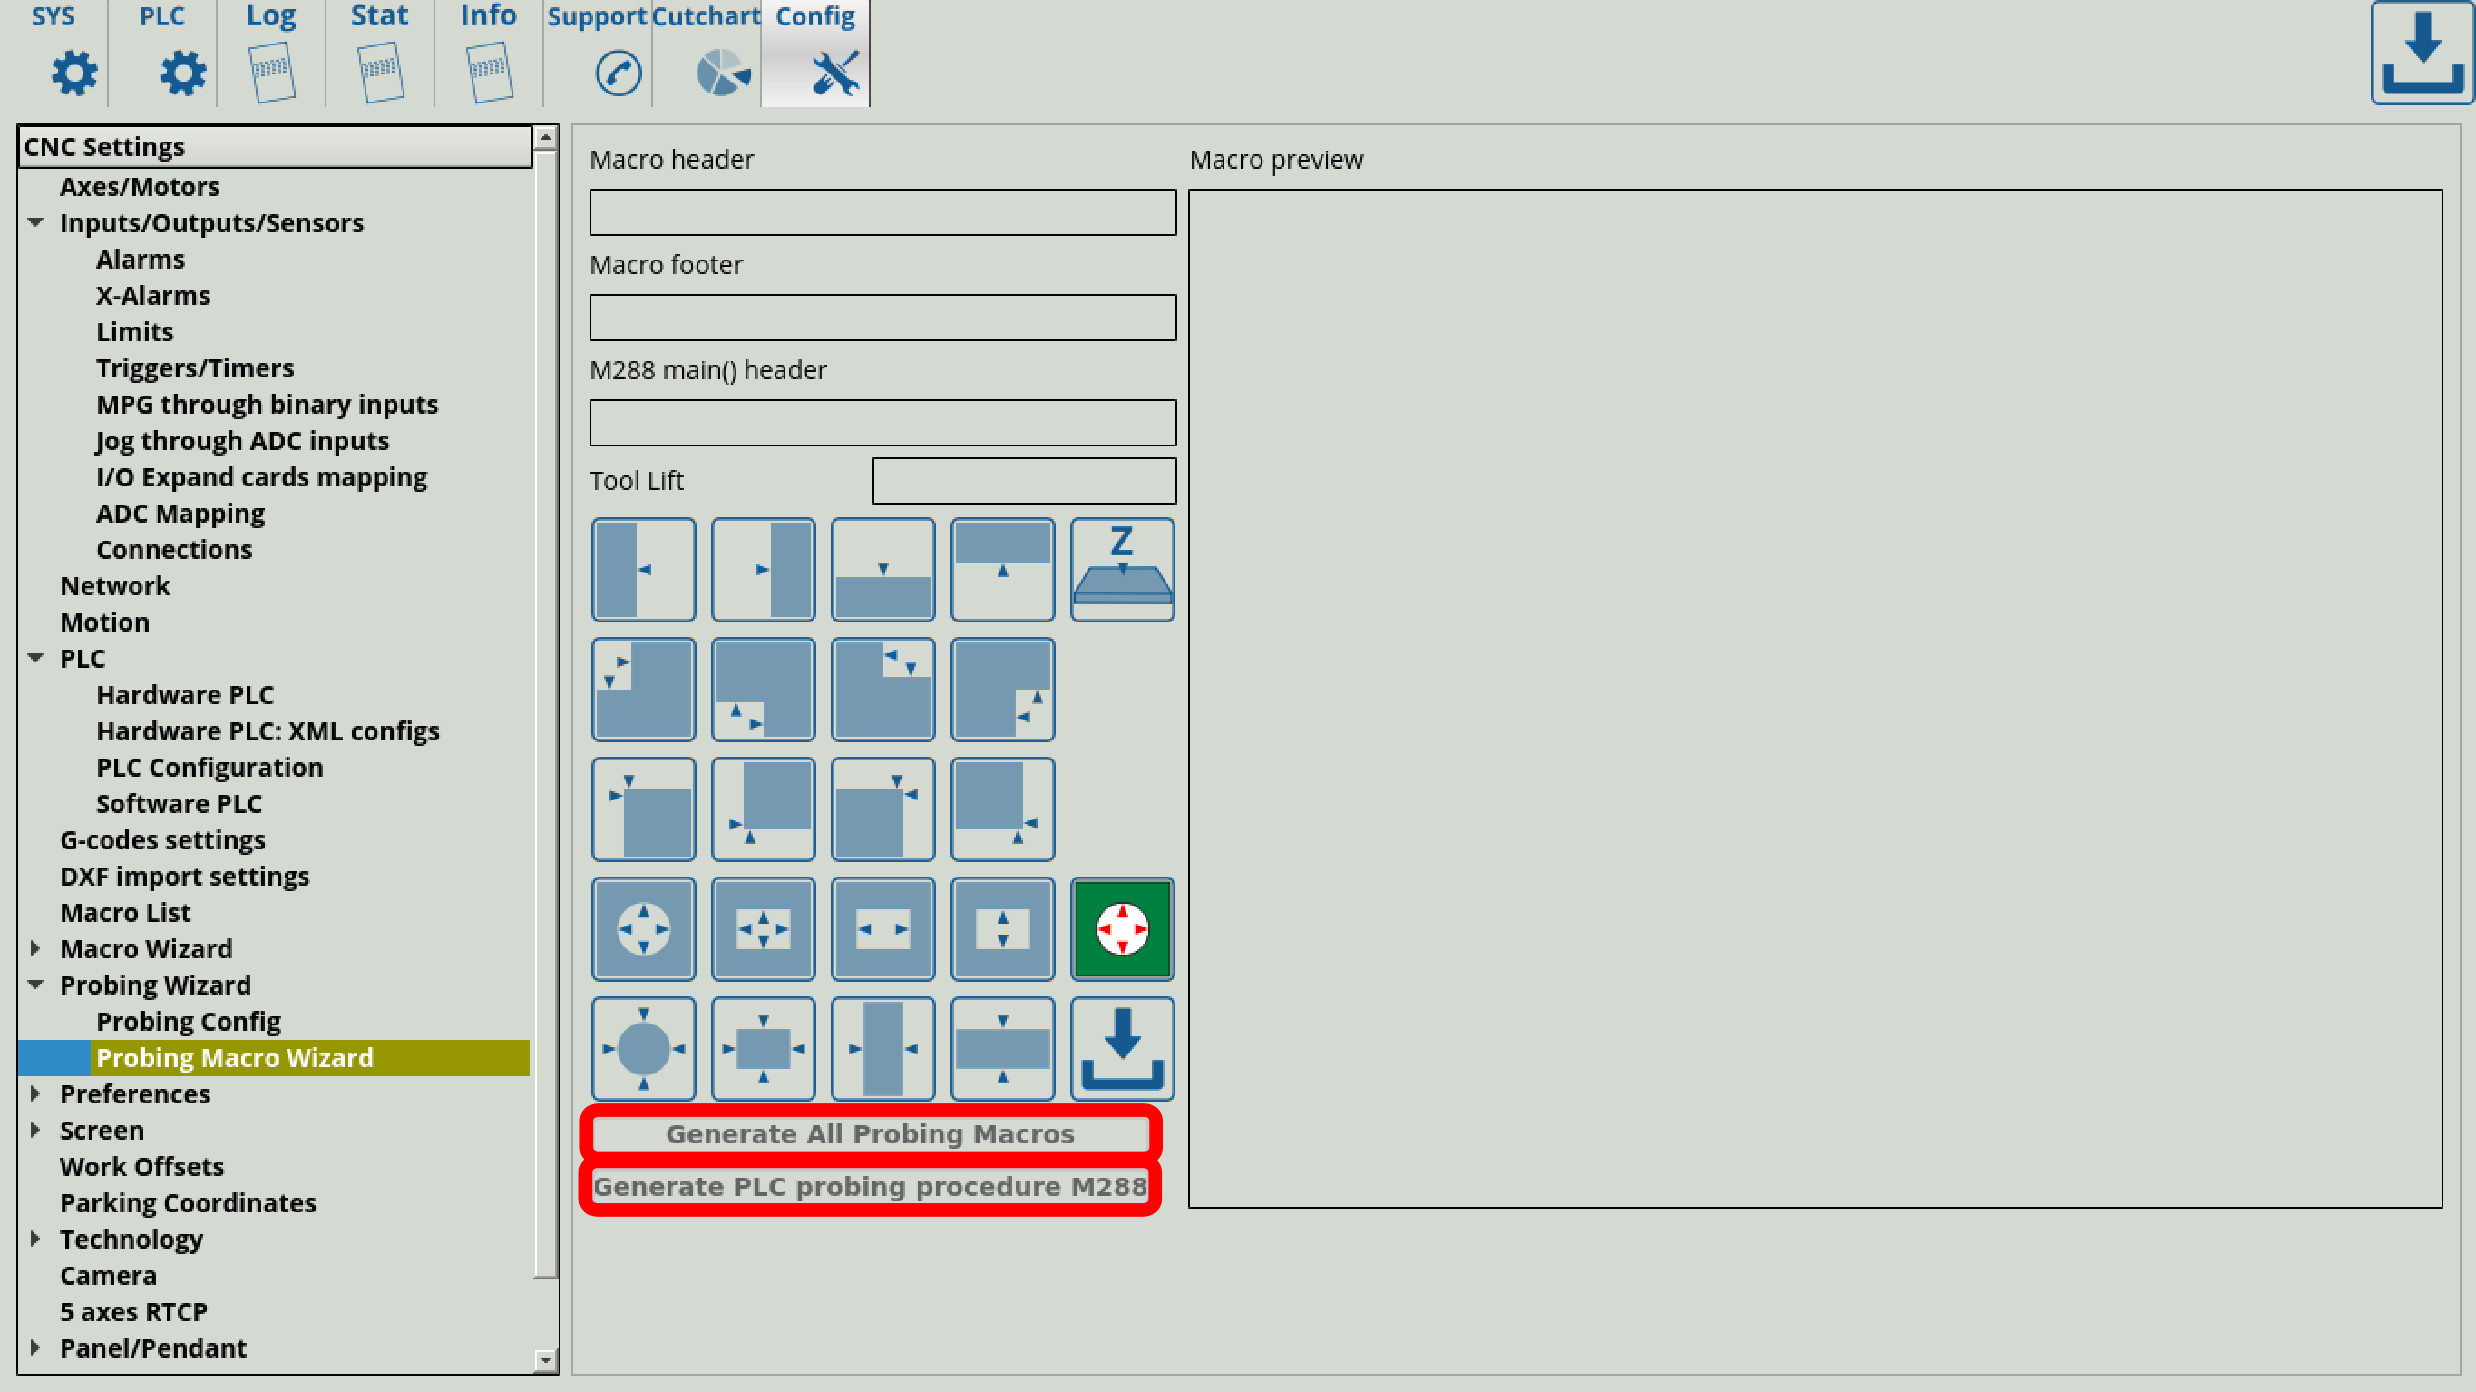
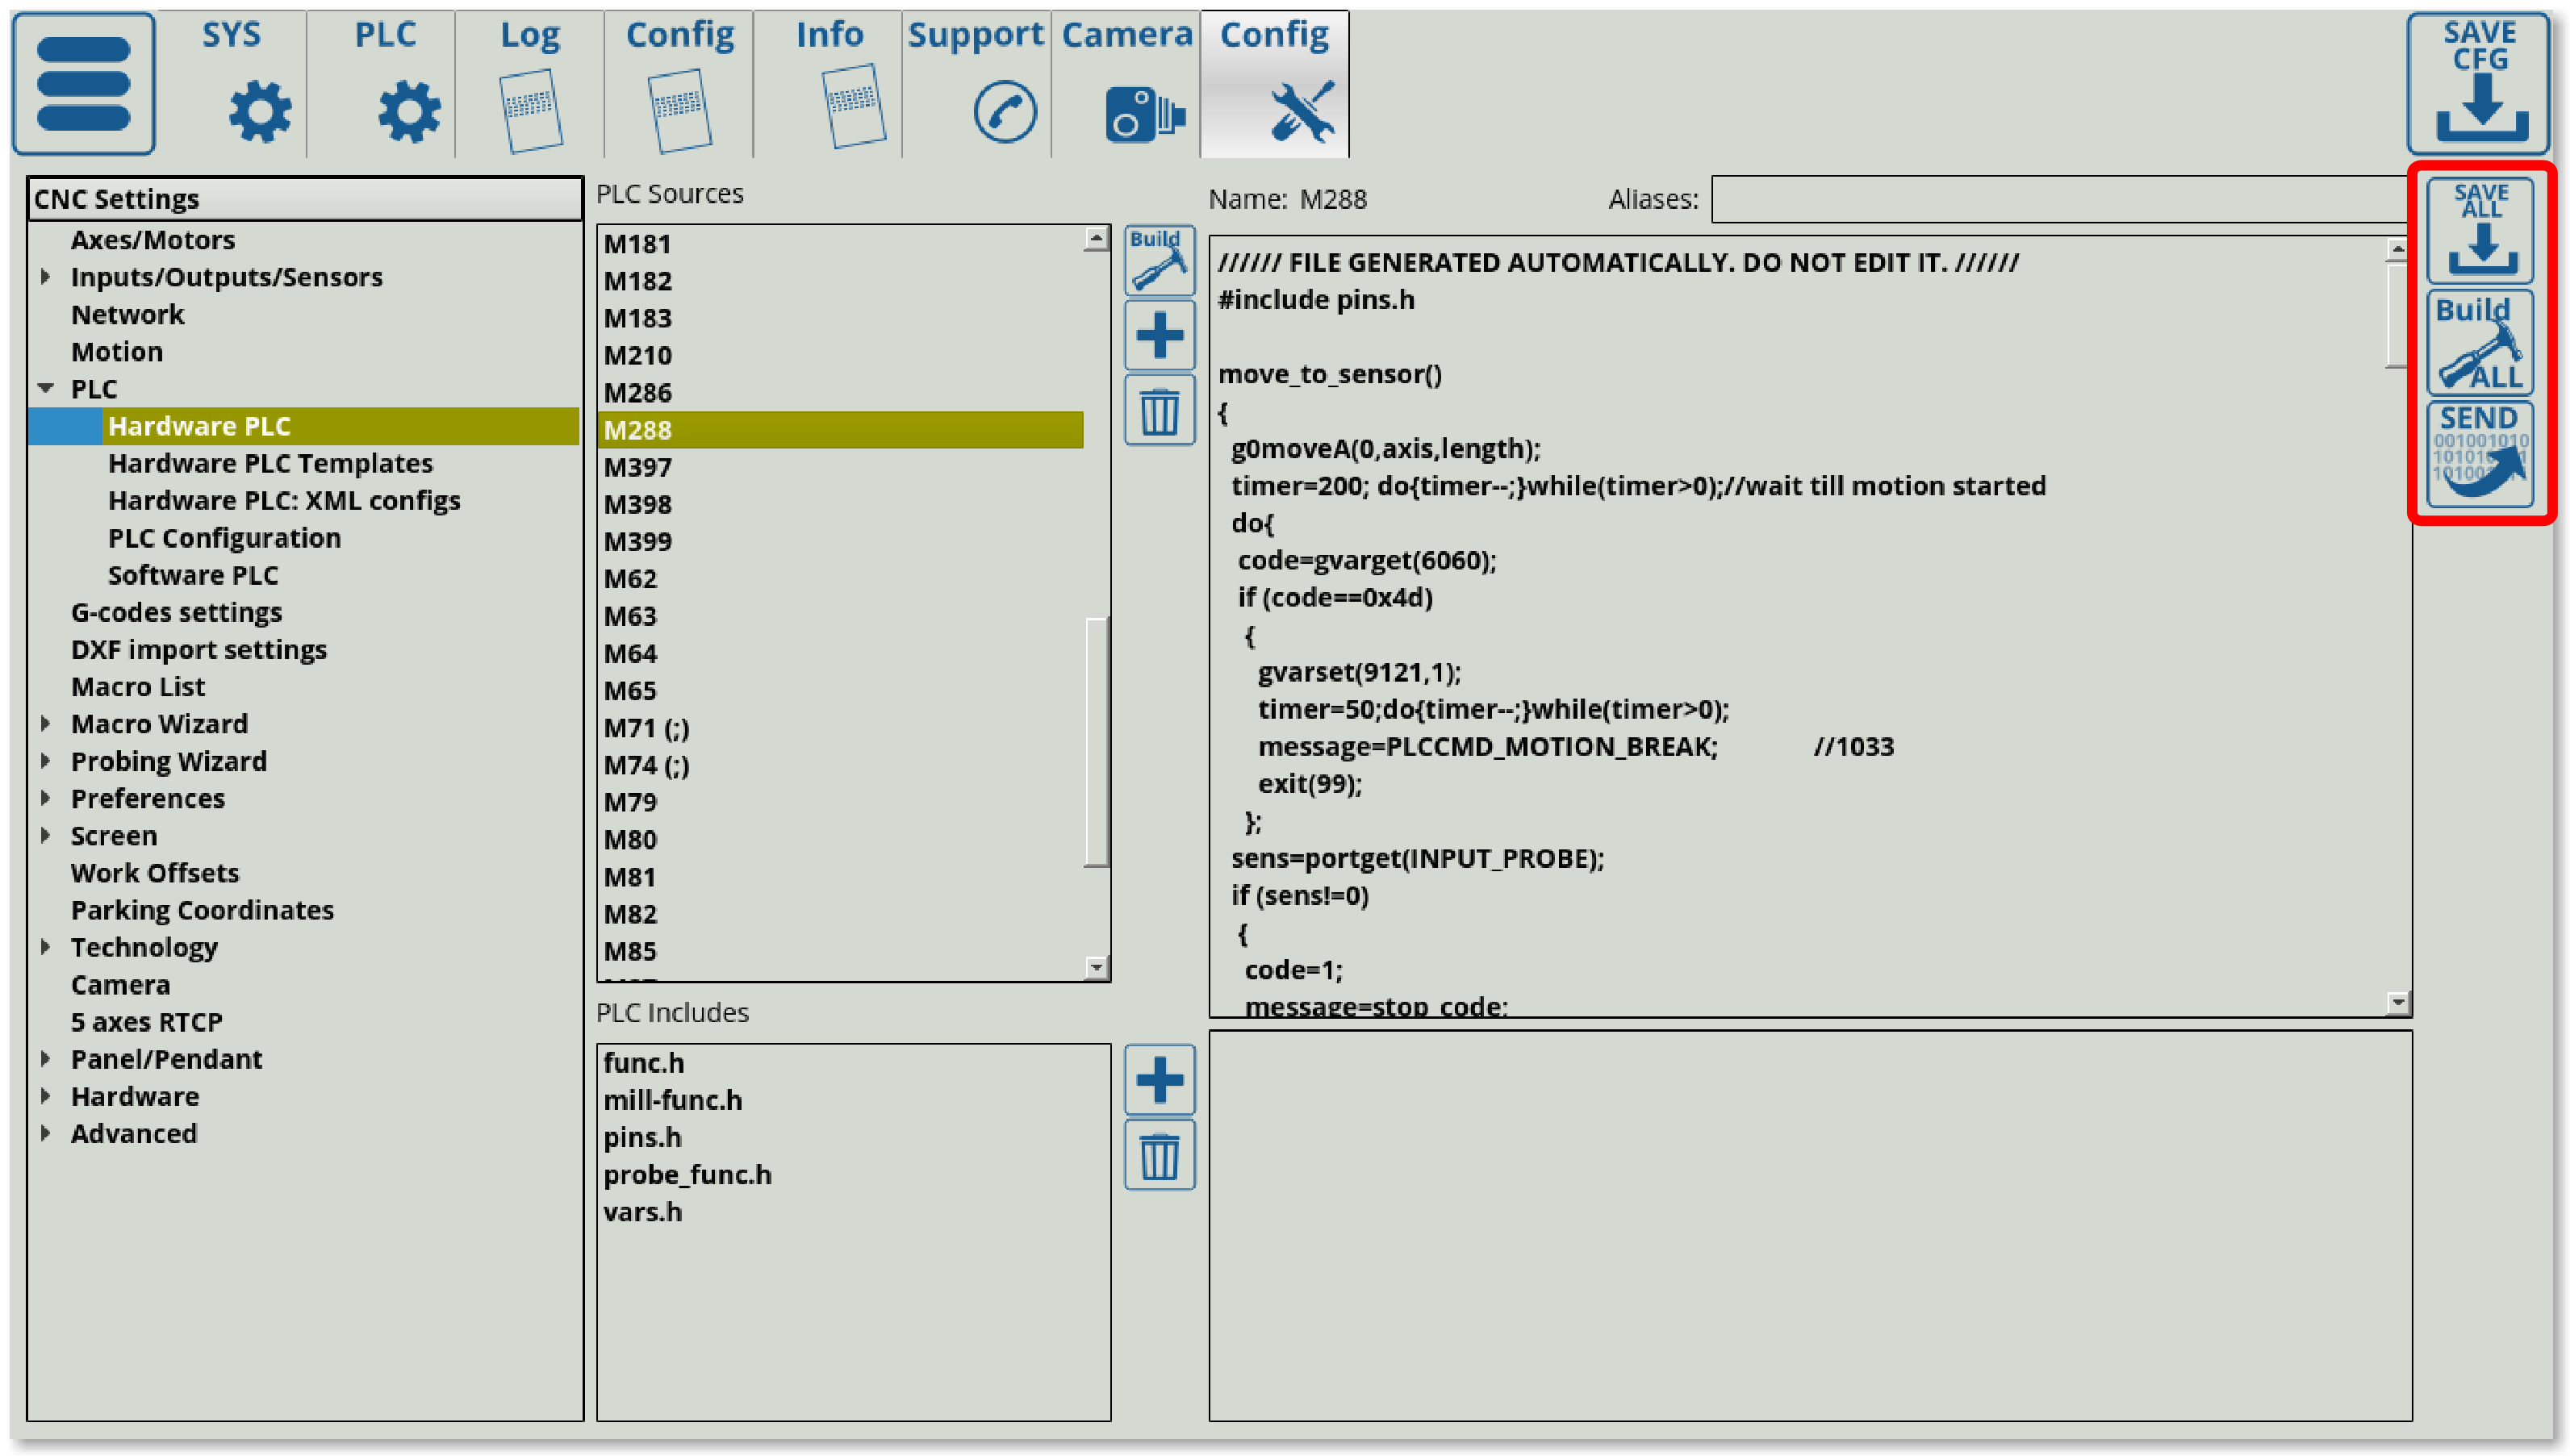
4. After generating the M288 probing procedure, head into CNC Settings > Config > PLC > Hardware PLC and click the Save All, Build All and Send buttons to trigger the PLC disk image reflashing process:
5. Double-check the TRIG04 procedure from Step 2, and edit it back to the code above if it had been changed (this can occur on older versions of the software).
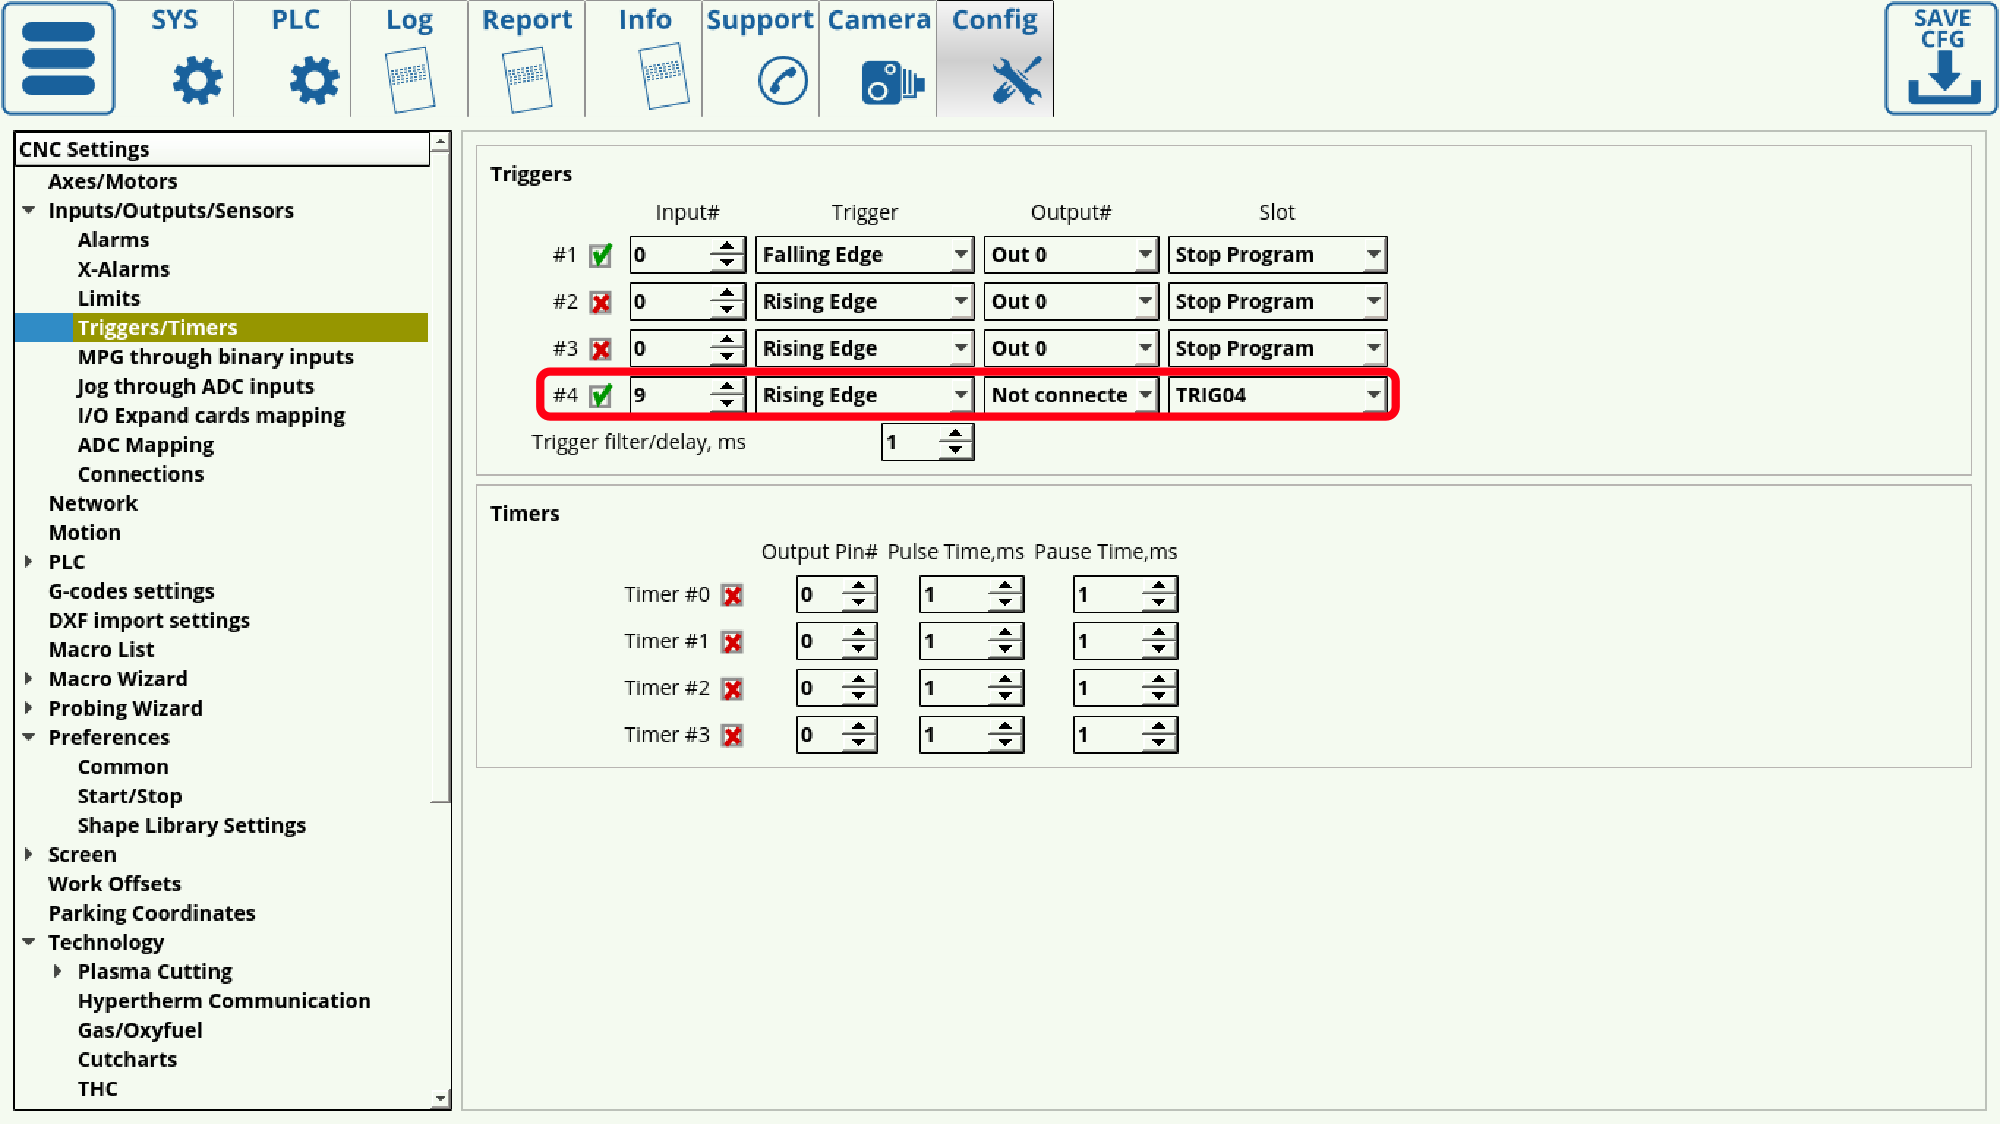
6. Make sure that the TRIG04 trigger has been automatically enabled in Inputs/Outputs/Sensors > Triggers/Timers:
The probe wizard setup should now be complete.
NOTE: Please not that probing configuration is separate from setting up items such as collision sensors, emergency stop buttons, etc, due to the use of different macros / PLC procedures.
Using the probe sensor in myCNC software
After the probe has been successfully connected, it can be used from within myCNC software. The probe sensor window can be opened from the main profile screen, and looks like this:
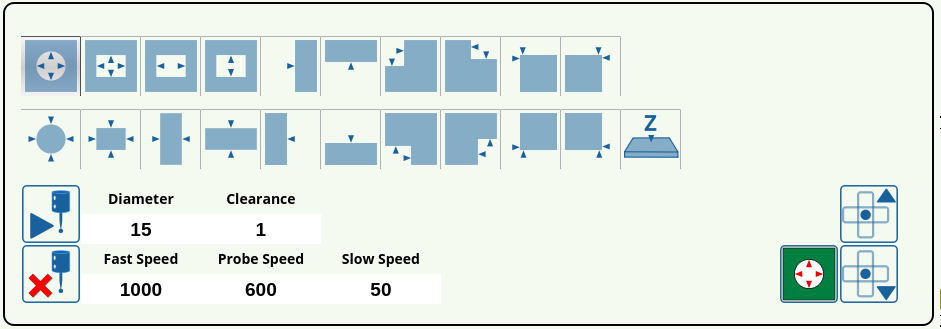
The full description of buttons for this window can be found in the screen description manual.
Probe tools currently available
The currently available CNC touch probe tools are the Wired Probe Sensor (SEN-PR-WR01), the Wireless Probe Sensor (SEN-PR-WL01), and the Wired Tool Setter (SEN-TS-WR01). The specifications and technical characteristics for each of these tools can be found below. All sizes are for reference. The diameter of the ball tip of the sensor is approximate within ±0.02 mm, with the spherical irregularity < 0.003 mm.
Wired Probe Sensor (SEN-PR-WR01)
- Unilateral repeatability: <0.003 mm
- Search directions: ±X, ±Y, -Z
- Deflection in XYZ directions: ±4mm
- Force to decouple in XY direction: from 0.5 to 0.8 H
- Force to decouple in Z direction: 2H
- Power supply: +5V
- Current consumption: <4mA
Wireless Probe Sensor (SEN-PR-WL01)
- Unilateral repeatability: <0.003 mm
- Search directions: ±X, ±Y, -Z
- Deflection in XYZ directions: ±4mm
- Force to decouple in XY direction: from 0.5 to 0.8H
- Force to decouple in Z direction: 2H
- Latency delay: < 2 ms
- Error detection delay: < 0.33 ms
- Probe power supply: CR2032 3V
- Probe current consumption: <0.6mA
- Receiver power supply: 5-12V
- Receiver current consumption: 35 mA
- Radio channel radius: 6 meters
- Radio frequency: 2.4 GHz
Wired Tool Setter (SEN-TS-WR01)
The tool setter is designed to determine the exact coordinates of the tool mounted on a CNC milling machine using the contact method. The CNC system generates these coordinates as the tool comes into contact with the tool setter measurement platform, and uses them to calculate the height and diameter of the tool, to link the machining program to the work tool location.
- Unilateral repeatability: <0.003 mm
- Search directions: ±X, ±Y, -Z
- Deflection in XYZ directions: ±2mm
- Force to decouple in XY direction: from 0.5 to 2H
- Body diameter and length: D=28mm, L=60mm
- Base size: 28x28mm
- Diameter and height of the ceramic pad: D=10mm, h=2.5mm
- Power supply: +5V
- Current consumption: >4mA
- Features dust and splash protection
- Features a brittle safeguard fuse
