Table of Contents
Wireless Pendants
Wireless pendants are currently sold in three configurations in the myCNC Shop.
Setting up the wireless pendant
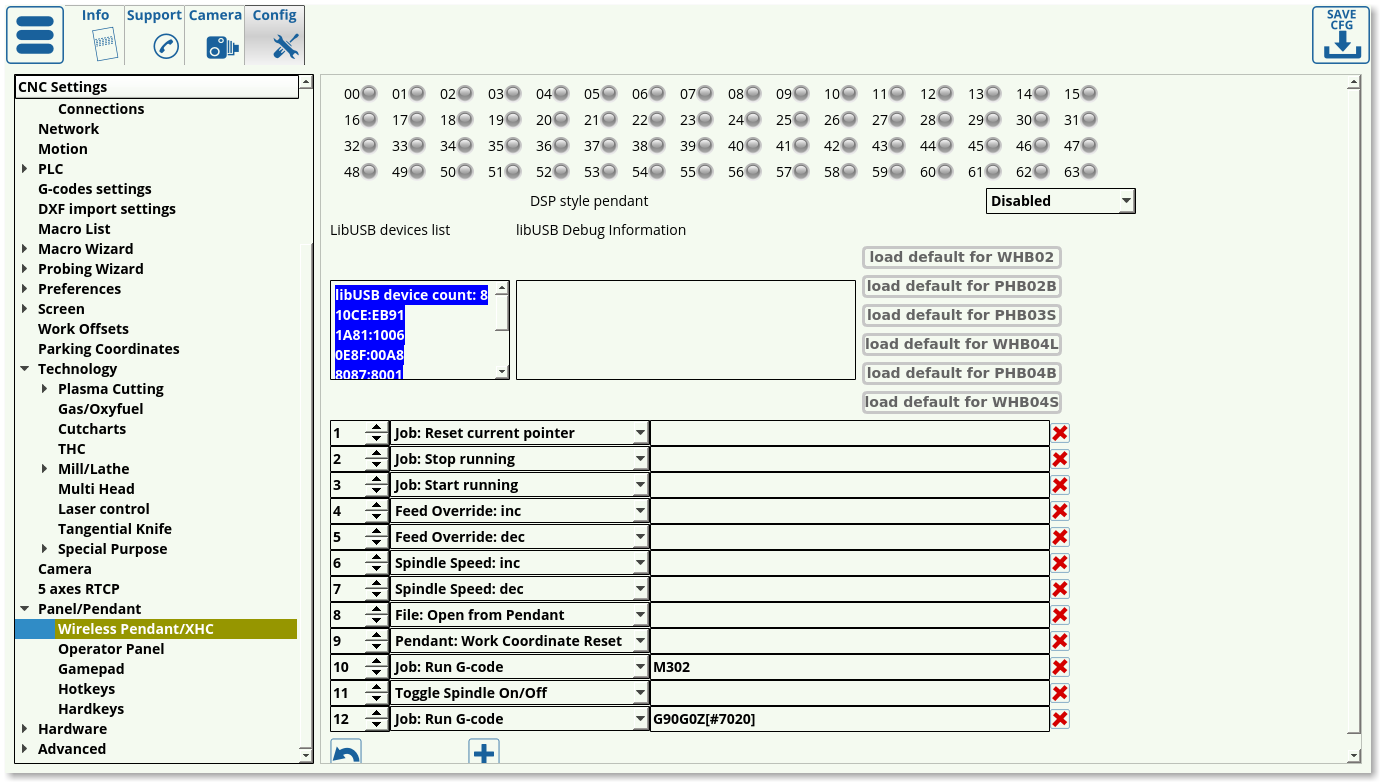
Upon opening Settings > Config > Panel/Pendant > Wireless Pendant/XHC, the user is presented with the following screen:
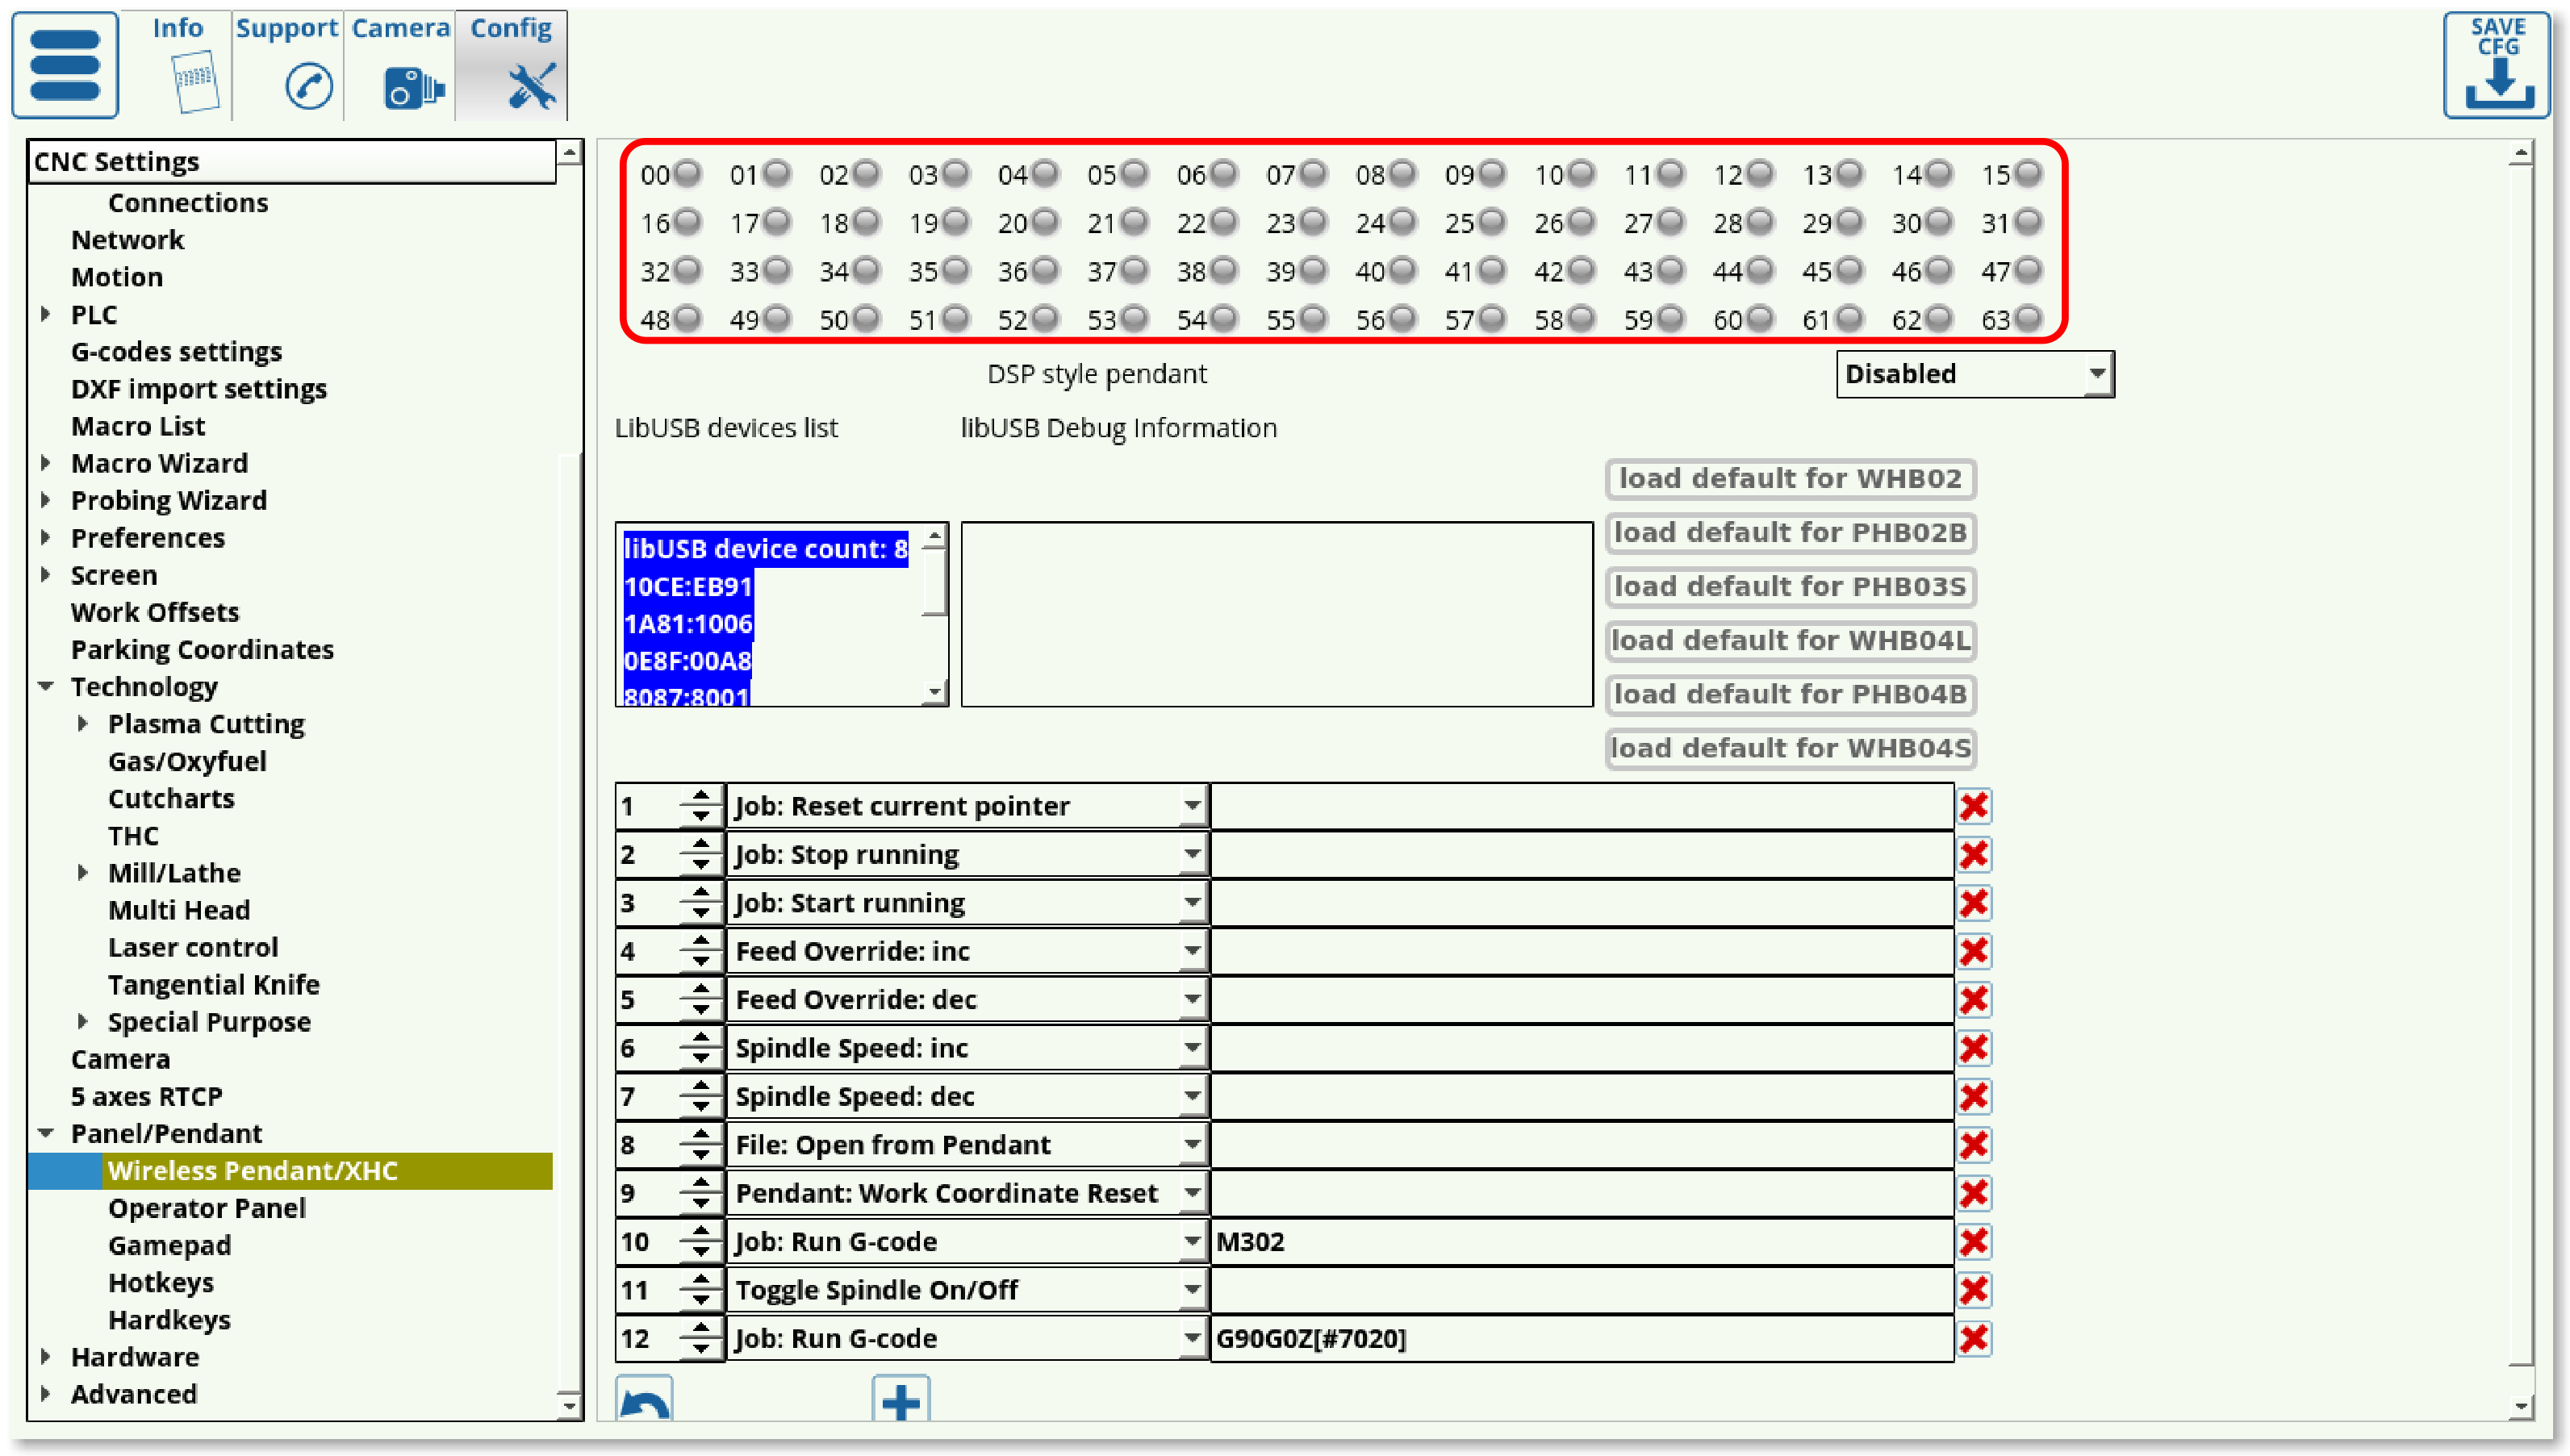
- The indicators at the top of the page serve to visually point out the pendant button which is being pressed. There indicators will light up green when the corresponding button is pressed:
- DSP style pendant should be disabled if the controller is used with a screen (enabled ONLY if the controller is using a PHB-04B pendant WITHOUT any monitor). This setting, when set to PHB-04B, disables a number of on-screen buttons as well as reassigns a number of the pendant button commands to a custom build. This allows for an emulation of a DSP style controller system, which eliminates the need for the monitor and is well suited for simple production runs which require limited settings changes or system configurations. It is recommended to keep this setting disabled unless strictly necessary, as it is designed for a purely pendant-oriented interface (on a system entirely without a monitor).
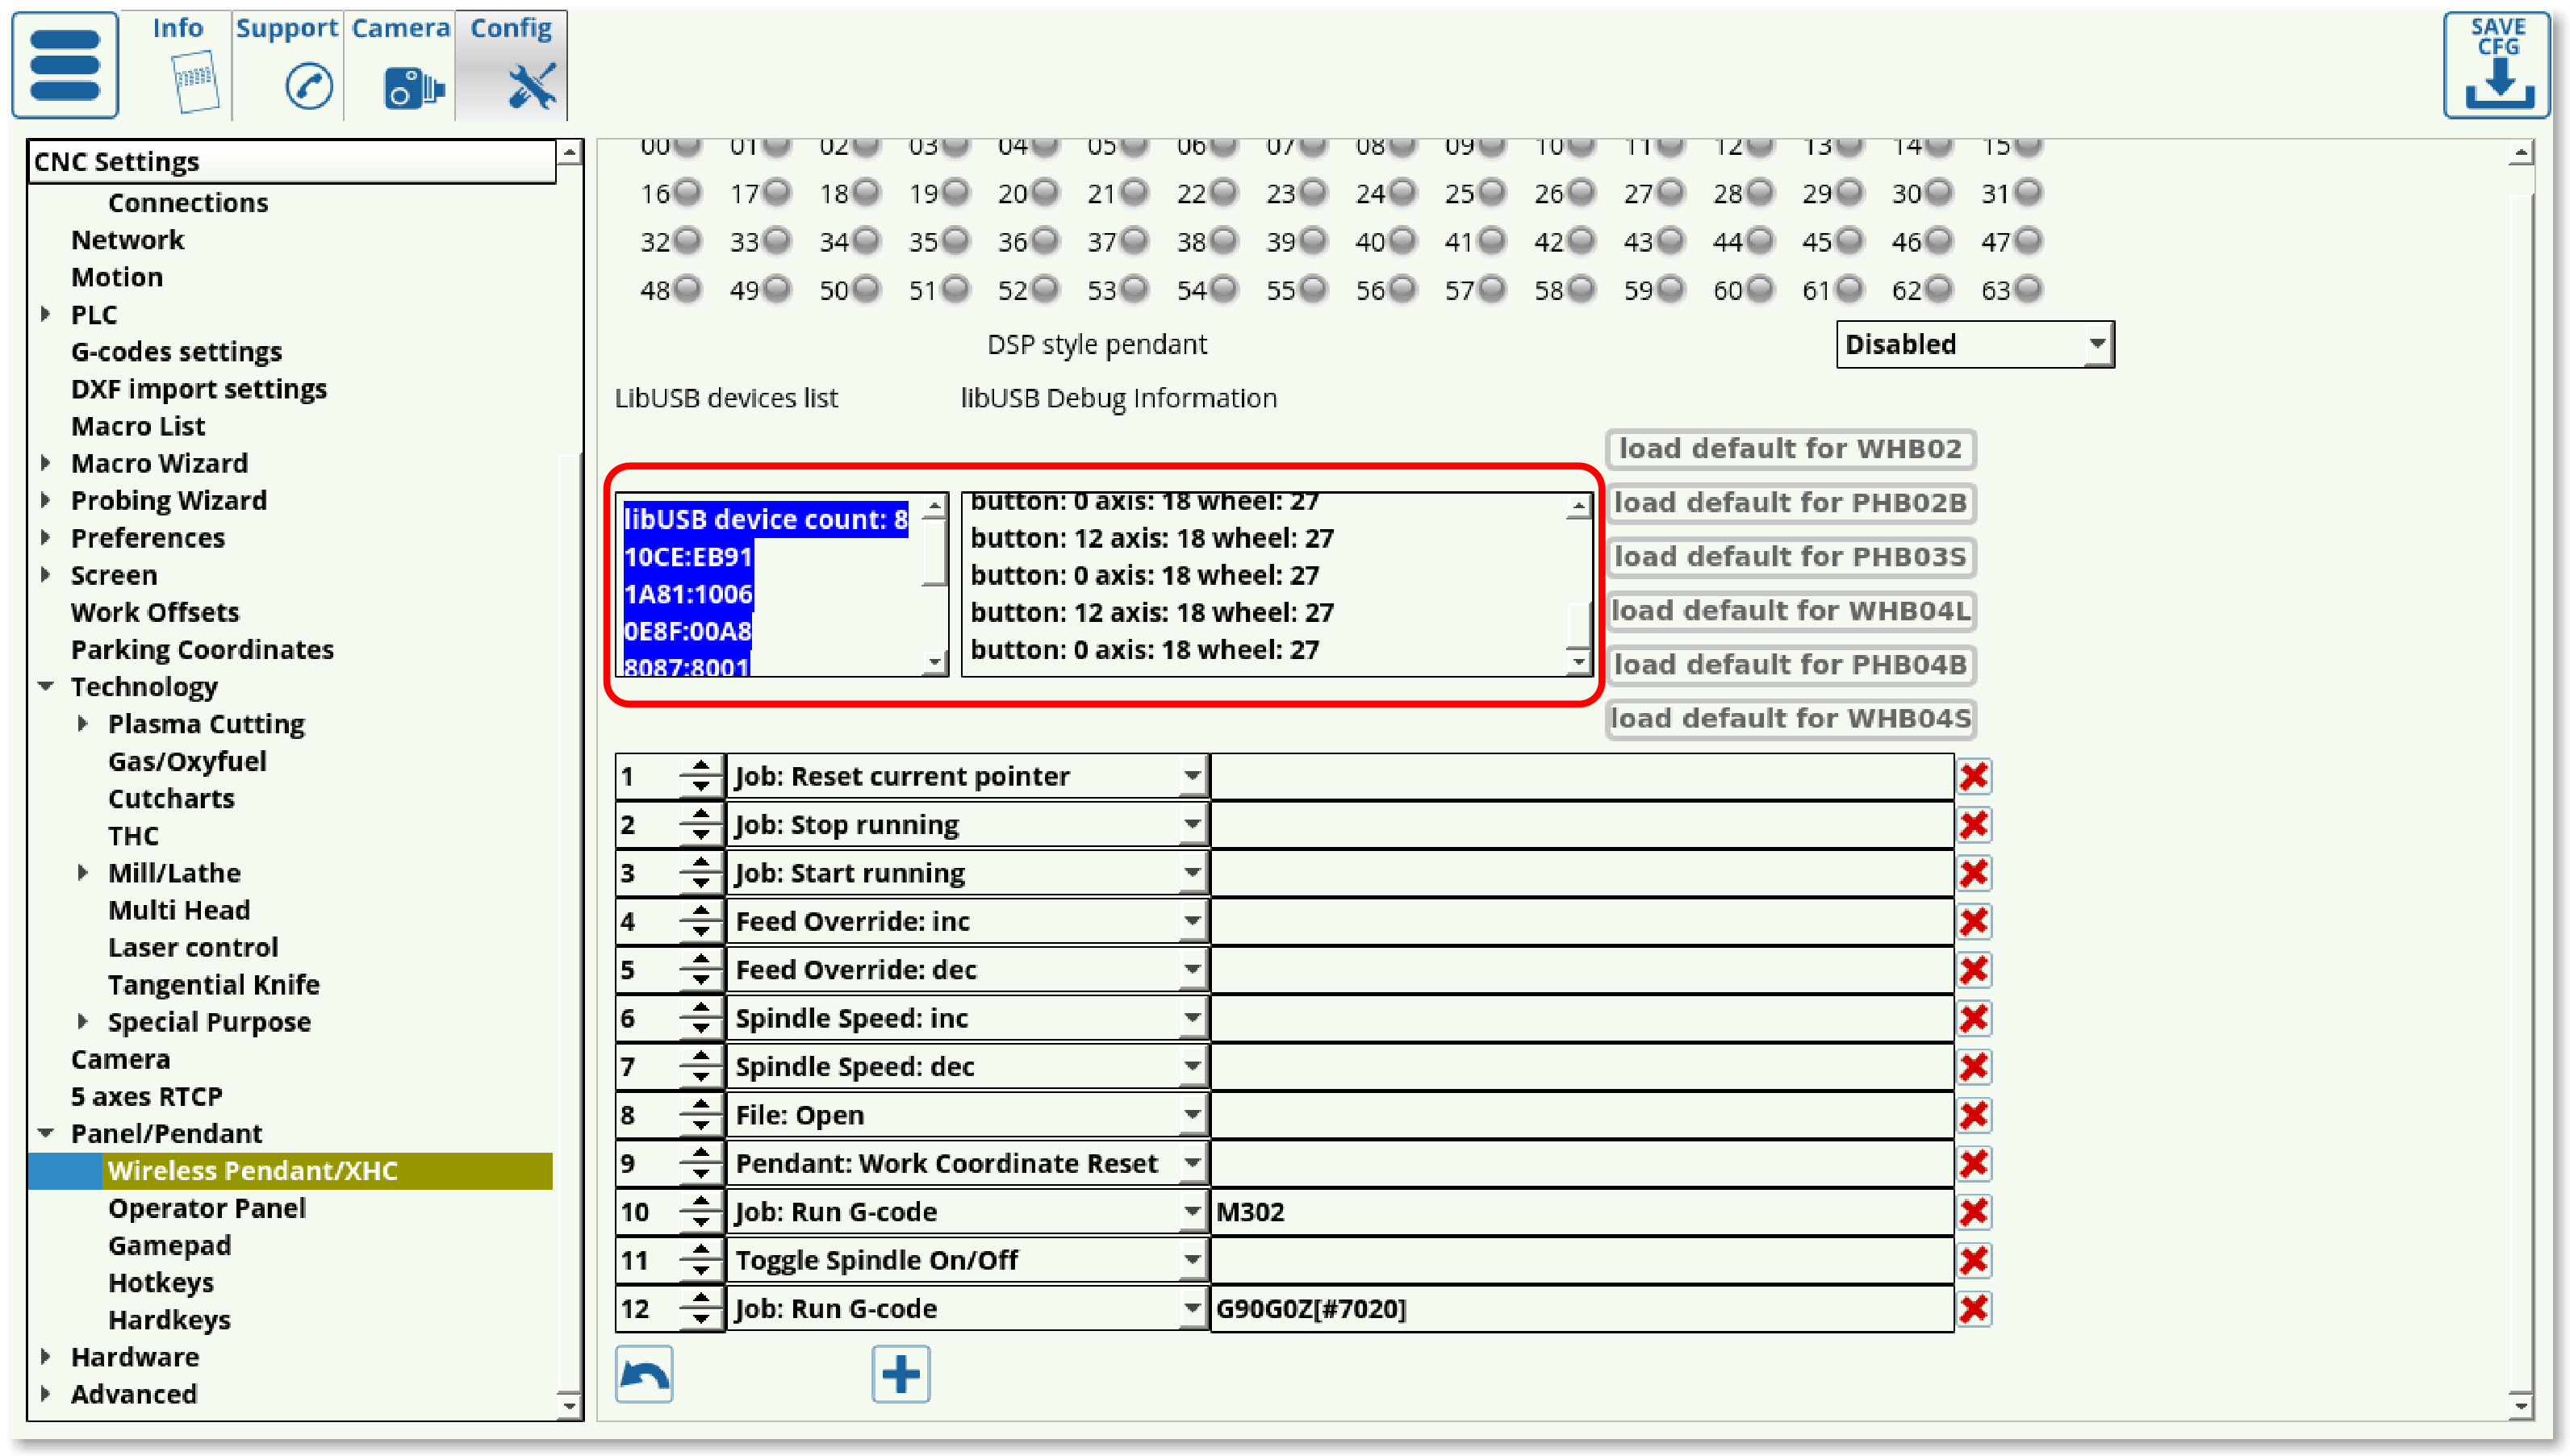
- The Device List lists the available devices, while the libUSB Debug information lists the messages that the pendant sends to the computer:
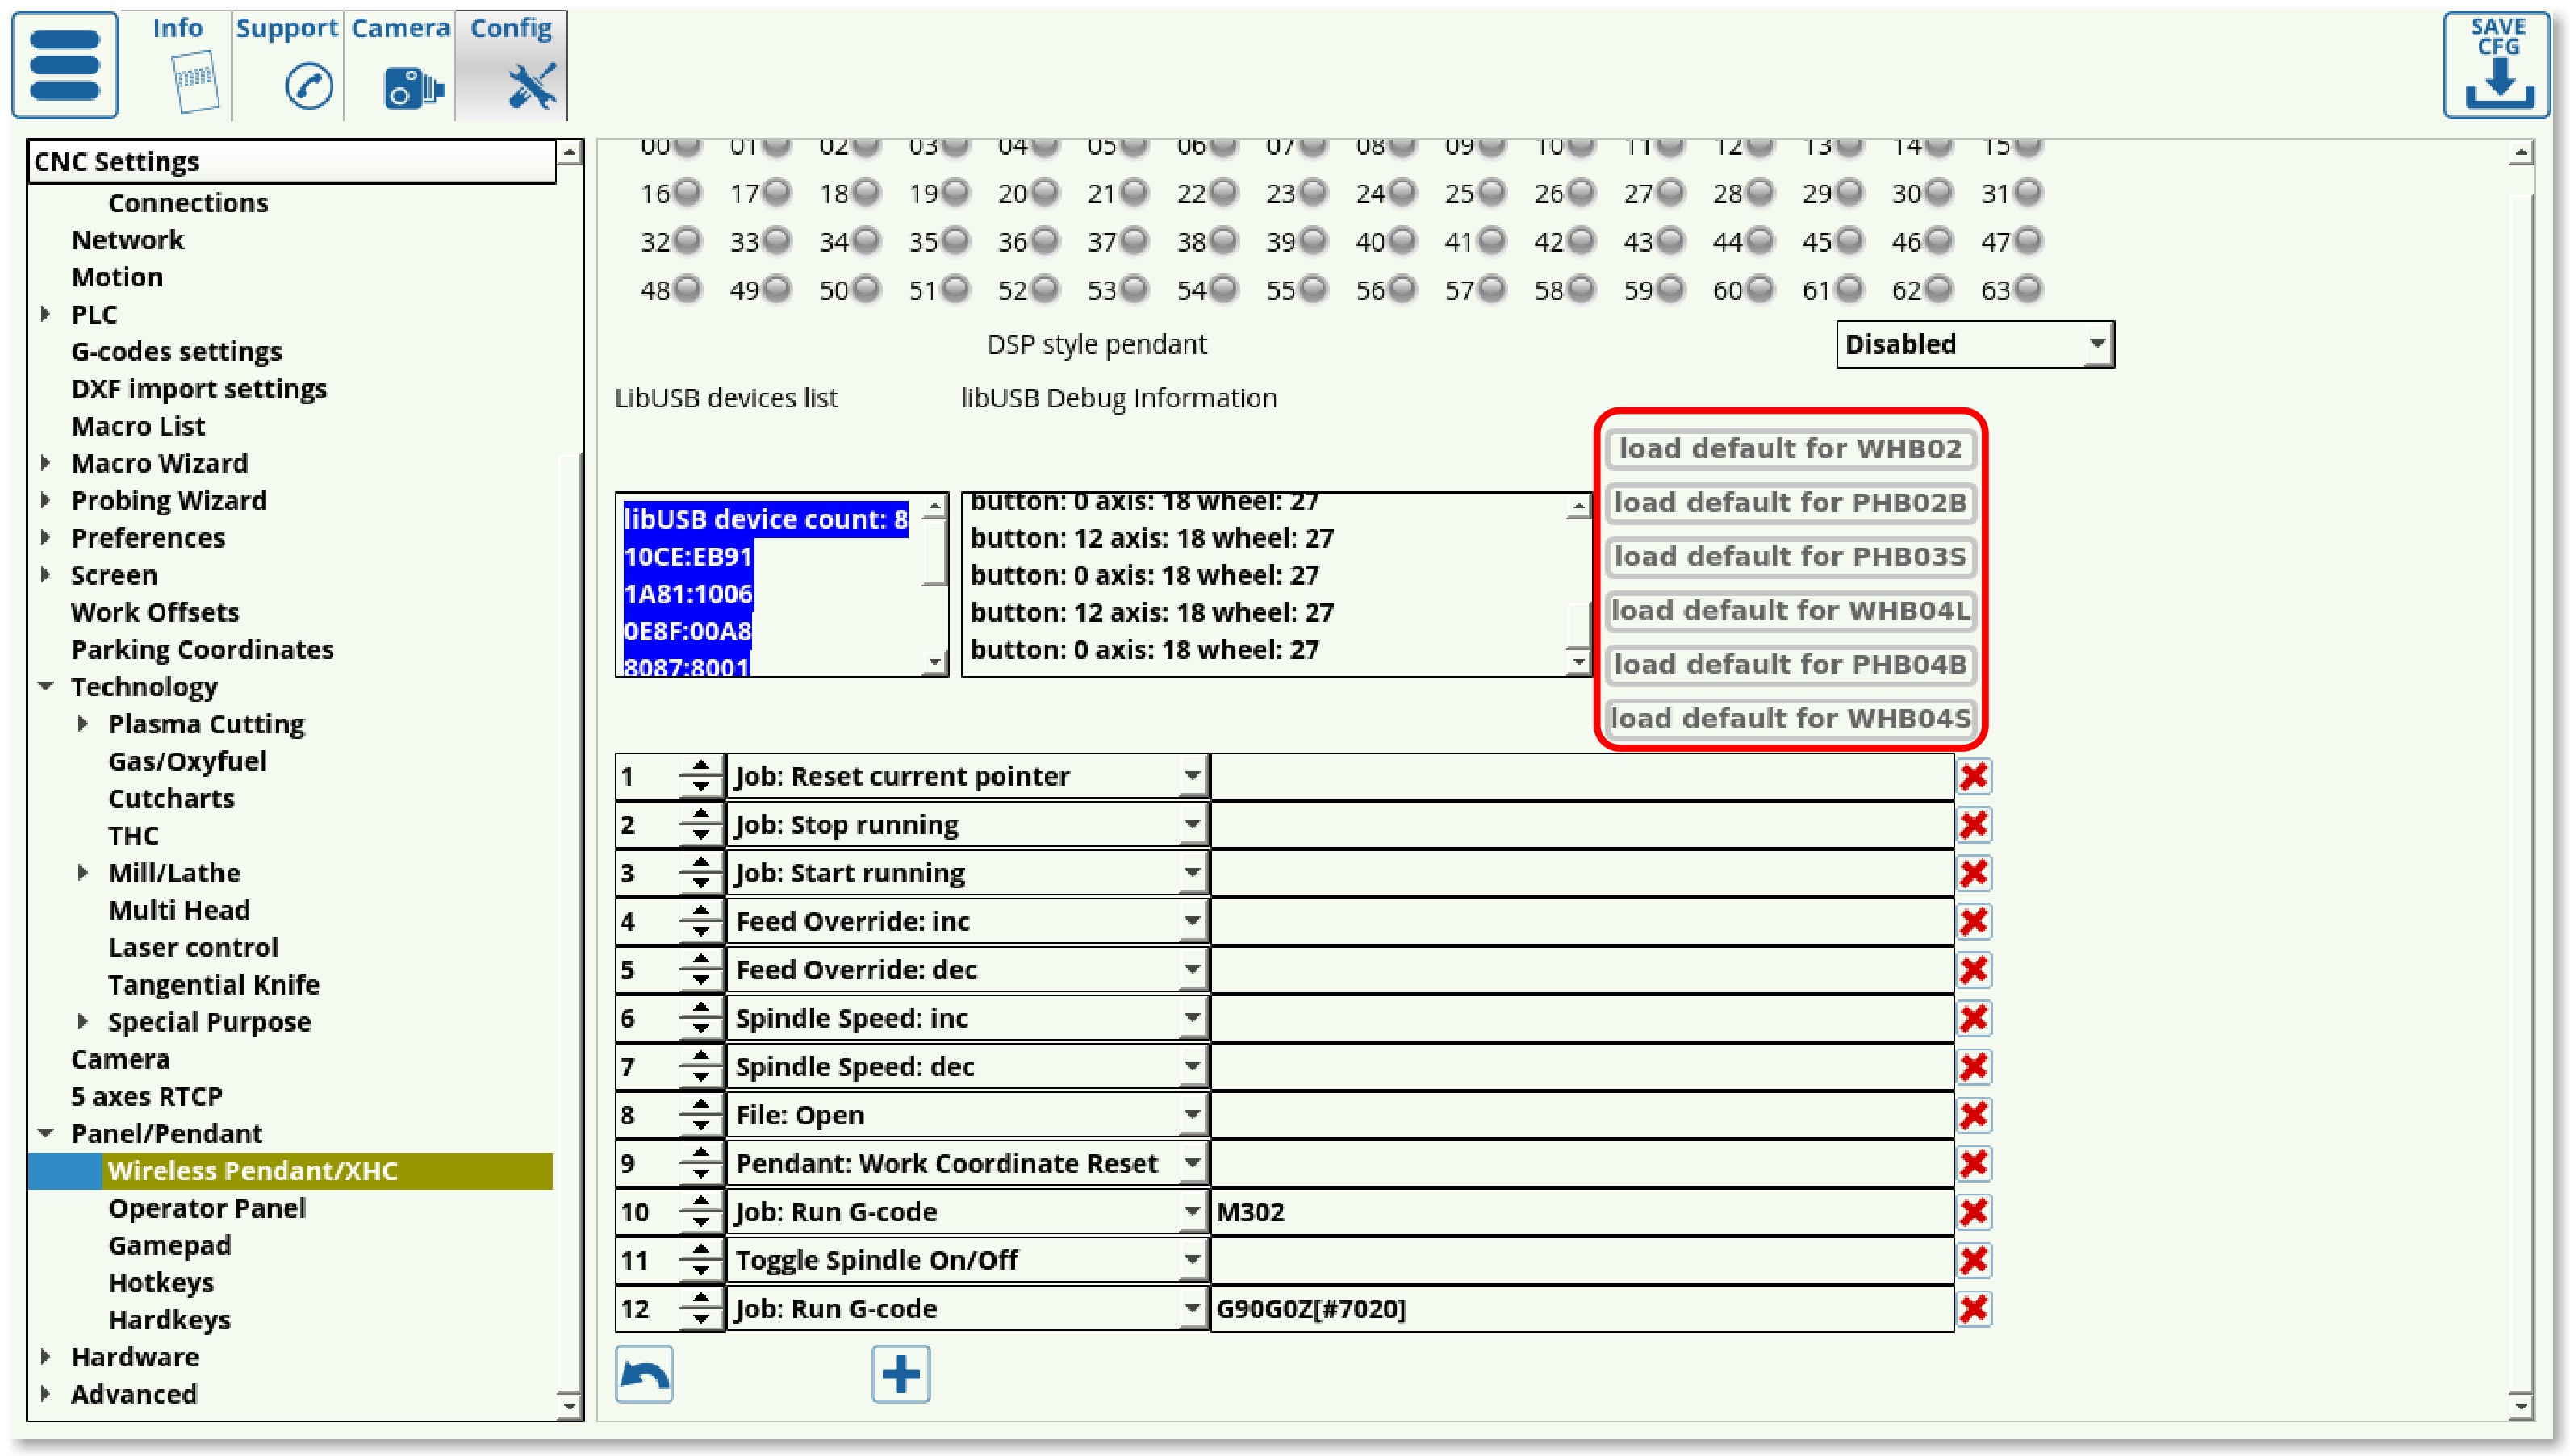
- It is possible to load the default button configurations from some of the popular wireless pendants available, as listed on the right side of the screen:
Assignable actions
If the pendant used is not listed in the defaults list, or the user wants to re-assign some of the button actions, the following options are available:
| Option | Description |
|---|---|
| CNC Action | This brings up a preset action (listed in MyCNC Actions list). These are preset actions, and the majority of items further on the list can be done simply by inputting the relevant text into the CNC Action field. Whether to use CNC Actions or to simply choose one of the items below is left to the user. |
| CNC Variable: Switch | This switches some global variable between set values. Example of syntax: 1000/33;22;11 where 1000 is the variable, and 33, 22, and 11 are the values the variable will switch between upon each button press or input |
| CNC Variable: Toggle | This toggles the specified variable On and Off. Example of syntax: 1001 |
| CNC Variable: Clear | Clears a global variable |
| CNC Variable: Set | Command to set the variable |
| CNC Variable: Assign | Writes the variable from the Global Variables list. Example of syntax: /1001 |
| File: Open | Open a file from the host computer (brings up the dialog window) |
| File: Open DXF/HPGL | Open a DXF/HPGL file from the folders specified in Preferences > Common |
| File: Refresh | Refresh the program file |
| Hardware: Direct Binary Set | Directly sets a binary to be ON |
| Hardware: Direct Binary Clear | Sets a binary to be OFF. For example, upon inputting 15 into the field, the 15th binary will be flipped ON |
| Hardware: Direct DAC Set | Sets the DAC. For example, input 0/160. Here, 0 is the channel number (always 0 for DAC), while 160 is the value in units. NOTE: The value displayed in the diagnostics panel in myCNC software displays the DAC value in volts, not units. Conversion is necessary based on the voltage of the power source used. |
| Hardware: Direct PWM Set | Sets the Pulse Width Modulation. For example, 1/1600. Here, the 1 is the channel number for PWM, and 1600 is the value PWM is set to |
| Hide: Custom Widget by name | Hide the custom widget |
| Job: Play 1 line | Run through a single command line (next line) |
| Job: Play 1 line backwards | Run through a single command line (previous line) |
| Job: Run G-code | Run a predefined G-code command (the command must be written out in the Message slot) |
| Job: Run G-code with Confirmation | Run a predefined G-code after confirming via a confirmation window (the G-code command must be written out in the Message slot). |
| Job: Start running | Begin running the control program code |
| Job: Stop running | Stop the control program |
| Job: Back to path | Run the back to path procedure - described here |
| Job: Skip forward | Move forward in the command program |
| Job: Skip backward | Move backward in the command program |
| Job: Skip forward 10 | Skip 10 lines forward |
| Job: Skip backward 10 | Skip 10 lines backward |
| Jog: X- | Jog in the negative x-axis direction |
| Jog: X+ | Jog in the positive x-axis direction |
| Jog: Stop X | Stop the jog in the X-direction |
| Jog: X- Y- | Jog in the negative x, negative y direction |
| Jog: X- Y+ | Jog in the negative x, positive y direction |
| Jog: X+ Y- | Jog in the positive x, negative y direction |
| Jog: X+ Y+ | Jog in the positive x, positive y direction |
| Jog: All stop | Stop jog for all axes |
| Jog: Shift Set | Jog: Shift and Jog: Ctrl both refer to the settings window in Panel/Pendant > Hotkeys. The shift set indicates that the Shift button has been pressed |
| Jog: Shift Clear | Indicates that the shift button has been released |
| Jog: Shift Toggle | Toggles the shift button on and off |
| Jog: Ctrl Set | Indicates that the control button has been pressed |
| Jog: Ctrl Clear | Indicates that the control button has been released |
| Jog: Ctrl Toggle | Toggles the control button |
| Jog Override: inc | Increase the jog override |
| Jog Override: dec | Decrease the jog override |
| Key press | Simulates a key press to be sent to the host computer |
| Key release | Simulates a key release from a keyboard |
| (Dlg)Key Press | Simulates a dialog key press, such as Shift, Enter, Delete, 0-9, etc |
| Move to toolpath | Move back to the toolpath |
| Manual cut | |
| Parking position: Save | Save the current position as the parking position |
| Parking position: Move to | Move to the parking position |
| Pendant: Axis (*) | Switches through all the available axis values on repeat (continuously looping through the values as the button is pressed) |
| Pendant: Mul (*) | Switches through all available step size values on repeat (continuously looping through the available step size values) |
| Pendant: Wheel CW | Record the input as wheel moving clockwise |
| Pendant: Wheel CCW | Record the input as wheel moving counter-clockwise |
| Pendant: Mul increment | Designed for pendants which lack a dedicated step size switch. This will increase the step size. |
| Pendant: Mul decrement | Designed for pendants which lack a dedicated step size switch. This will decrease the step size. |
| Pendant: Axis change + | Changes the axis to the next axis available |
| Pendant: Axis change - | Changes the axis to the previous axis available |
| Pendant0: x0.001-1 | Sets the increment for the machine movements which is controlled by the software pendant (older versions of the software have a pendant widget which can be used as a substitute for a pendant control) |
| Pendant0: Axis off | This turns off the selected axis in the software pendant widget (older version of the software) |
| Pendant0: Axis X-C | Sets the axis that the software widget pendant will be sending commands to |
| Pendant: Work coordinate Half | Takes the pendant work coordinate (in the axis specified on the pendant) and halves it |
| Pendant: Work coordinate Reset | Resets the work coordinate specified in the pendant axis |
| PLC: Run procedure | Run a PLC procedure (if multiple controllers are present, this defaults to the master controller) |
| PLC: Run external unit procedure | Run a PLC procedure on a slave controller. The syntax for the command will be as follows: controller number / command / variable (for example, 0x01/M74/#7009) |
| Run Numpad | This brings up a numpad for a specific variable/item into which the user can then type in a value. The user can set this to bring up the numpad for any device variable/gvariables/screen items. Example of syntax: cnc-gvariable-5522 - this will bring a numpad typing into which will change the value for the Global Variable #5522 (step size) |
| Show: Pendant control widget | Brings up the pendant control widget in the myCNC software |
| Select axis | Select the particular axis |
| Show: Widget | Shows a particular widget, such as Library Shape, Diagnostics, Config, etc |
| Show: Custom widget by name | Shows a particular widget, called by its name |
| Feed overdrive: inc | Increase the feed overdrive |
| Feed overdrive: dec | Decrease the feed overdrive |
| Feed overdrive: Set % | Set the feed overdrive as a percentage of the default (100%) |
| Spindle Speed: inc | Increase the current spindle speed |
| Spindle Speed: dec | Decrease the current spindle speed |
| Spindle Speed: Set | Set the current spindle speed |
| Tie Toolpath Position to current work position | Used on control programs with a large number of parts, this allows to tie the toolpath position to the current work position. Effectively, this allows to cut out a small part of the control program anywhere on the sheet, by simply specifying the position of the toolpath - extremely useful for small remainders of metal sheets which can still fit one of the parts of a larger control program file. |
| Toggle Machine/Work DRO (if applicable) | A setting for pendants which only show one coordinate system at a time (machine or program coordinate). This allows to switch between the two coordinate systems - used only on select controllers. |
| Toggle Jog enable/disable | Turn jog on and off |
| Toggle Jog mode unlimited/step | Switch between the unlimited and a set step jog for machine movements |
| Toggle Soft Limits enable/disable | Turn the soft limits (specified in Inputs/Outputs/Sensors > Limits) on and off |
| Toggle Flood on/off | Turns the liquid cooling (flood) ON and OFF |
| Toggle Spindle on/off | Toggle whether the spindle is currently ON or OFF |
| Toggle Spindle CCW on/off | Toggle the spindles CCW rotation ON or OFF |
| Toggle Constant Velocity on/off | CV (constant velocity) is described in MyCNC Constant Velocity Mode (CV) manual |
| Toggle Virtual Keyboard | Brings up the virtual keyboard up on the screen, or hides it if already present. |
| Toggle: custom widget by name | Specifies a custom widget to bring up on the screen (or close it if already displayed). |
| View: Zoom In | Zoom in on the control program visualization |
| View: Zoom Out | Zoom out on the control program visualization |
| View: Fit to window | Fit the entire view into the visualization window |
| Work coordinate: Set | Set the work coordinate (using the specified axis value from the user panel, NOT the typical pendant control) |
| Work coordinate: Reset | Reset the work coordinate (from user panel) |
| Work Coordinate: 1/2 | Half the work coordinate (from user panel) |
These options allow the user to edit every button on their pendant control to their particular configuration if required. For simple pendants included in the defaults list, it is usually recommended to use the default settings.
XHC wireless pendant control for MS Windows
How to install XHC wireless pendant control for MS Windows:
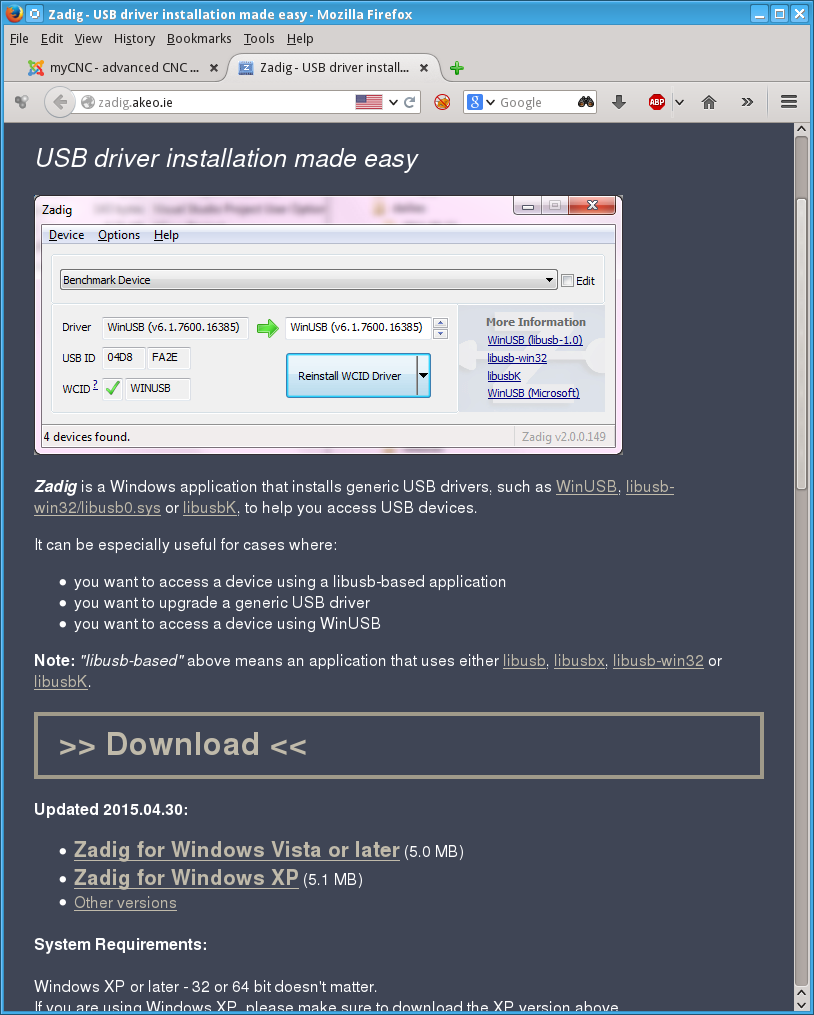
1. Download the “Zadig” software from http://zadig.akeo.ie/
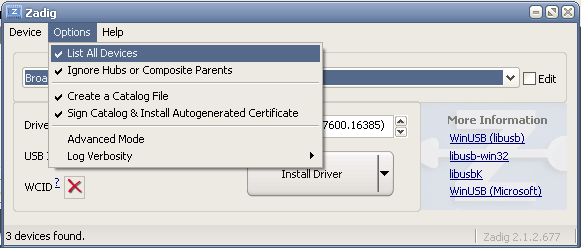
2. Run the utility, select “Options menu” and check menu “List All Devices”
3. Select “USB HID” device in the displayed list (Check USB ID that starts with “10CE”)
The following ID's are available:
| ID | Pendant Model |
|---|---|
| eb66 | |
| eb6f | PHB02, WHB02 |
| eb93 | WHB04B-6 |
| eb92 | PHB02B-6 |
| eb91 | PHB04B-6 |
| eb70 | WHB04L |
4. Select “WinUSB” driver and press “Replace Driver” button, confirm driver changes.
5. Restart myCNC software, it should get access to XHC Pendant control over “libusb” driver.
XHC wireless pendant control for Linux
Pendant control on Linux should be automatic, however in case of issues it may be necessary to check the 99-xhc.rules file.
Linux has a “udev” subsystem that handles hotplug events, for instance an event when a USB device is inserted, in which case Linux reads the ID numbers, looks into udev rules, and runs the appropriate scripts. For XHC pentants, the myCNC team has a rules file with which the user is allowed to read and write data to the pentant. In order to diagnose issues, it is necessary to locate this file:
/etc/udev/rules.d/99-xhc.rules
and check if it mentions the device that is currently being used (for instance, the WHB02 pendant would be 10ce:eb6f). Normally, myCNC creates this file automatically. In case it does not exist or does not contain the necessary line(s), then something is wrong.
By default, access is open to the administrator ONLY, a simple user does not have the permissions. As such, if you are running into an error while opening the file, check that your user has the necessary permissions. If the file exists, you can try to delete it, restart the software and see if the file reappears.

